Fairy Beach Houses

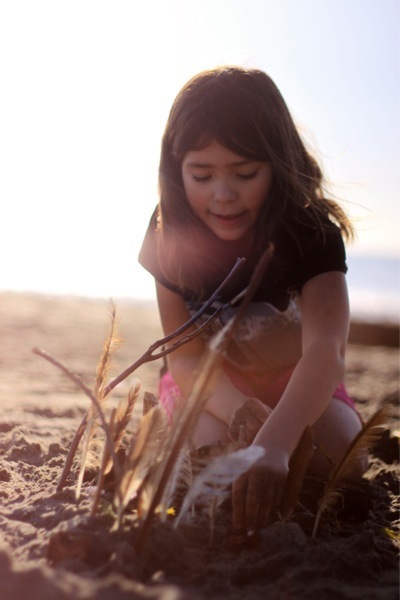


 Fairies live along the seashore befriending mermaids. And they love help with home-building, too! I see whimsical fairy homes in the woods, but not as many beach homes. My girl and her cousins found the idea enchanting. They collected treasures. And built courtyards and a moat. And told stories of the fairies who lived among feathers and sand.
We explored and found another giant creation with driftwood and kelp. What sort of fairies lived in this castle?
Creative play inspires grand storytelling. And long after we had rinsed the the sea salt from our hands, my girl mused about the fairy ball going on beside the moonlit sparkling sea. Hurrah for imagination. Hurrah for the sea. Hurrah for fairy houses everywhere.
Where do your children build in the summertime? I would love to hear their stories!
Leprechauns
'Tis the season for magic at the end of the rainbow!

Patterns for these little leprechauns are over on our Etsy Shop.
We hope that you enjoy them!
Heart Gardens
The Dragonfly Class at the Nevada City School of the Arts made heart gardens last week. These beautiful creations inspired me to share the project with all of you.
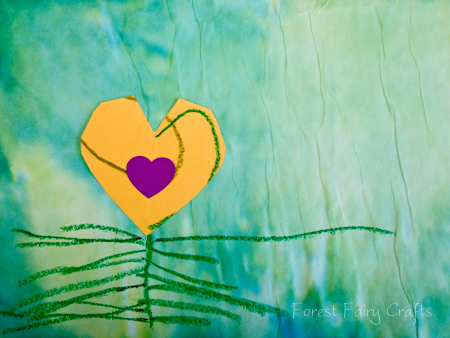
Our young students got to cut hearts, decorate and glue. They all were lovely and unqiue.
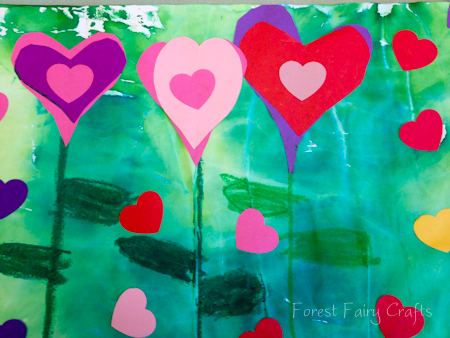
Creating the garden is simple. You need
- paper
- tissue paper (make sure it can 'bleed' and is not colorfast)
- construction paper (or any colored paper)
- pastels (or colored pencils or crayons)
- glue
The backgrounds for these gardens could be made with watercolors, but we have a fun technique that kids of all ages enjoy. To make the background, first cut or rip light green and dark green tissue paper into strips of various sizes. I did this project with my three year old son and he had a great time cutting the tissue paper. The wonderful thing is that he cannot go wrong. Even when he started cutting itty-bitty tiny pieces of paper.
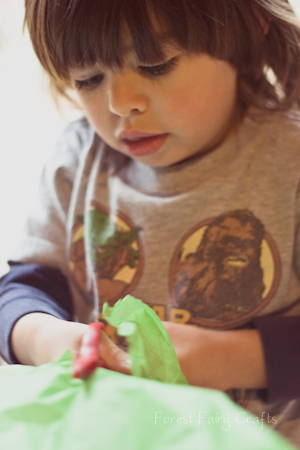
He has absolute creative freedom, which is delightful for children. I loved his fierce concentration as he made a pile of scraps.
After he tired of cutting and tearing, we brought out a piece of white paper. This one is cardstock for our family cards, but we used drawing paper at school. We use this technique on watercolor paper, too, with beautiful results. I would imagine that glossy papers wouldn't soak the color in, but anything else should work fine. We used water to stick our tissue paper scraps onto the white paper.
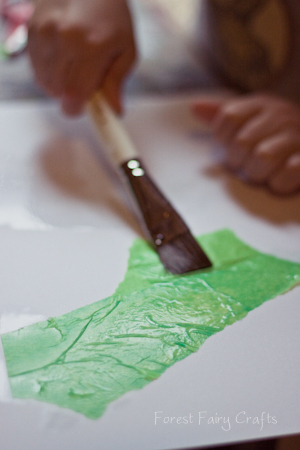
We did a little water first, then stuck the paper, then more water over the top. As the page gets soaked, the first layer isn't as important. Neither is flat scraps :)
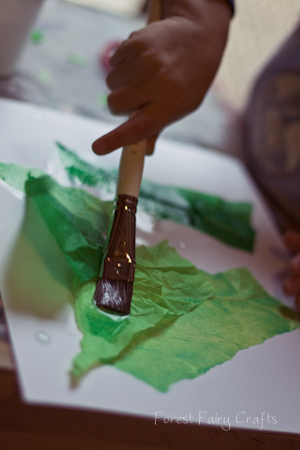
The water smoothes down tissue paper nicely. Children start to see the 'bleeding' effect quickly, and that is a little magical. Overlap the colors and keep painting over the top.
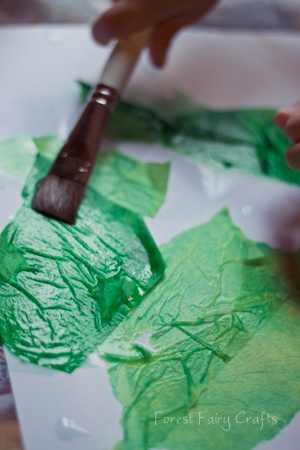
Keep going until the entire page is covered with wet tissue paper. Paper going over edges is fine.
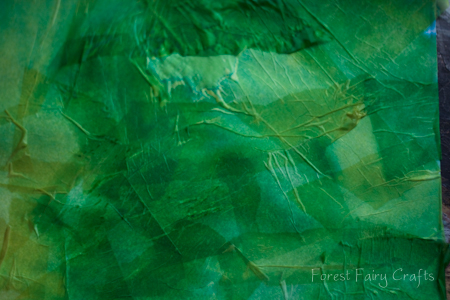
You may need to take a break when children notice that the water is turning colors!
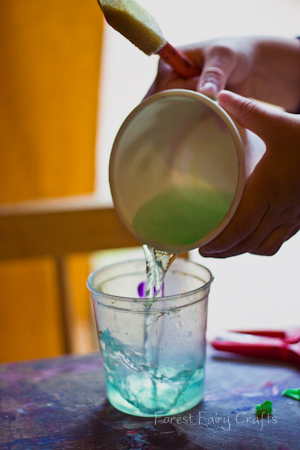
Leave the paper for a few hours to dry. When the tissue is dry, pull it off and the colors will have transferred to the white paper. You can use the tissue paper for another projects- tree leaves, etc.
Now you have a lovely background for your garden. Cut out hearts. We did have a heart punch for the smaller hearts. Use a oil pastel to draw stems and leaves. And have fun!
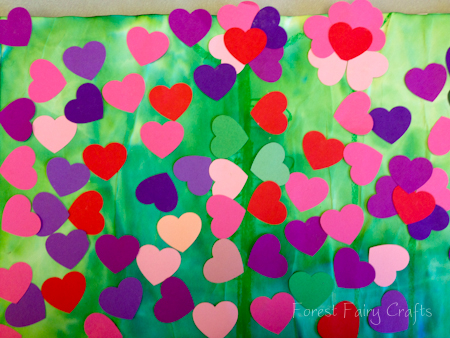
We can never have too much love :)
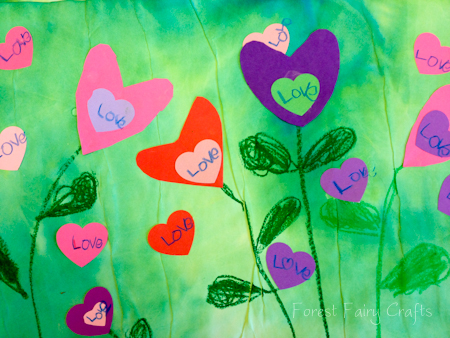
Enjoy!
February Fairy Family

Fairies

I am crafting my way through the wait-list for fairies. These two capture this particular 2012 winter-season for me. Winter here in Northern California has been overcast and chilly. But no dramatic storms. No major snow. Hardly feels like winter at all. So here are fairies of the season, with their cool colors, their hints of springtime with brightness here and there. They sing of color.
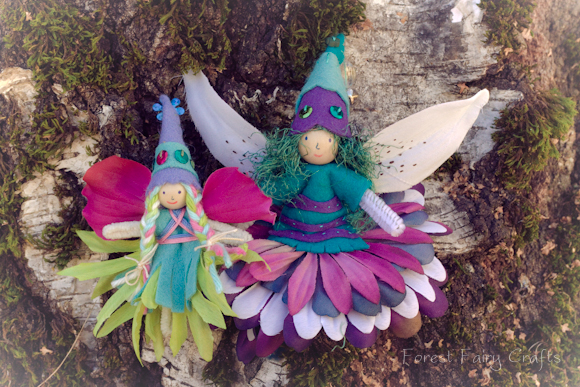
And they remind me of the quieter days of winter, when the forest is sleepy and still. The girl, well, she is ready for spring with her bright pink wings. She may be dressed in cool colors, but she celebrates the flowers that will be here soon.
I rarely have a plan when I craft these fairies. I sit with my felts and my petals and let them inspire me. I am lucky indeed.
Oh, and the Mama-fairy (or sister-fairy) has a fancy hat. She has an icy bead and silver bell that reminds me of frosty mornings.
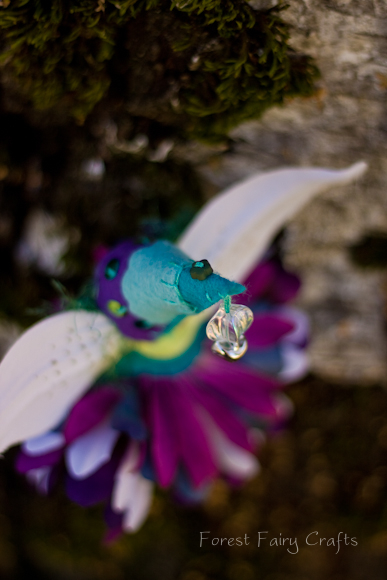
The flower bead on her hat is a dark green, as well. A quiet promise. We believe :)
Wishing you a lovely day!
My Heart's Wish
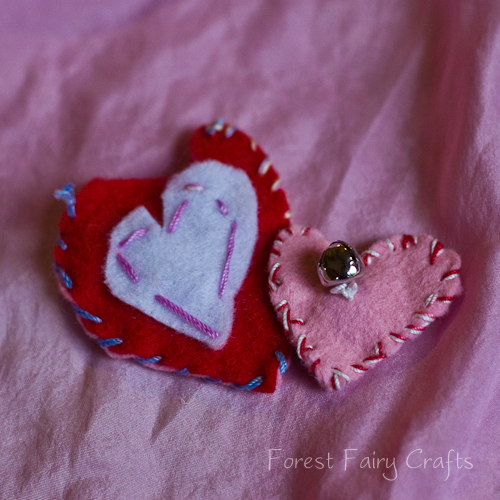
Last week, I went to a teacher-gathering in the evening. My eight-year-old asked to use some felt and thread while I was gone.
"Are you sure you're okay on your own? I won't be here to help you."
"I'll be fine, mom."
A mama's dream. With a twinge of sadness that this little girl is not so little anymore. So away I went and, when I came home, she gave me her heart's wish.
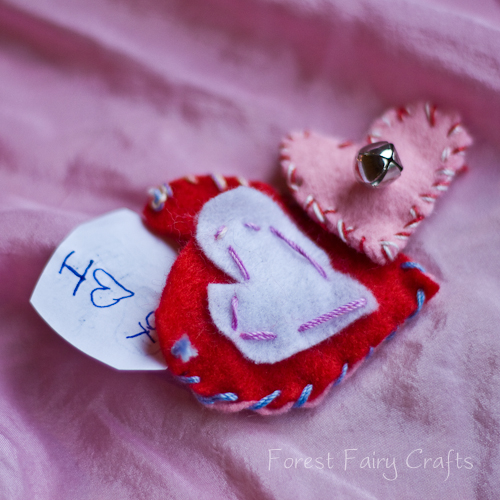
She made this mama teary-eyed. I believe in the power of hearts. And wishes.
She created two small hearts. The pink one is 1.5 inches across and the pocket-heart is about two inches across. They are very simple to make. The little heart has a heart bead inside of it, no stuffing at all. She sewed the bell on, then sewed them together, sealing the heart-shaped bead inside. I doubted her idea at first. But, sure, enough, I find a great tactile comfort in feeling that little heart shape inside the bigger felt heart. The fact that the heart is sewn shut and the bead is safe and sound inside is also soothing. The jingle bell is cheerful. Again and again, I learn to trust the creativity in children.
Her larger heart is a pocket-heart. She sewed a heart shape on the back and front separately, then attached both hearts together with an open top. She gave it to me with a story that the heart is meant to be shared. I can write her little notes and then she can write me little notes and we can both write wishes. The heart keeps giving.
I hope to sew enough for each student in her class, or perhaps put a few in the mail for cousins and grandparents. I asked her where she found her inspiration and she said, "I just thought of it."
I love many things about these hearts (of course), but my treasure is the personal stitching that catches her age perfectly. We may be tempted to guide children towards neat, even stitching and perfectly cut heart shapes, but really, the imperfections shine. Even her little knots with the strings fraying are wonderful.
Children can play with felt like they play with blocks and paints. Their wishes are magical.
Thank you for sharing, Anika!
Handmade Ornaments, You Still Have Time, Really!
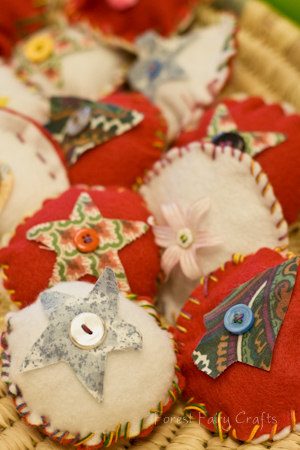
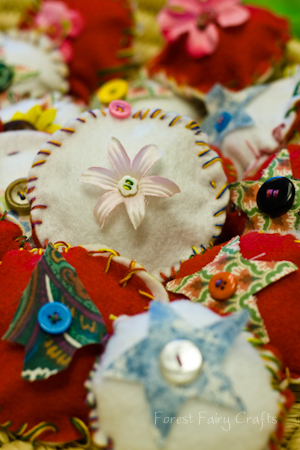
Only days remain, yet these ideas don't take more than an hour. You could collect the supplies in a cute bag or basket to give on Christmas morning, then share craft-time together that day and sew a memory of the holiday together.
Who can resist a well decorated tree?
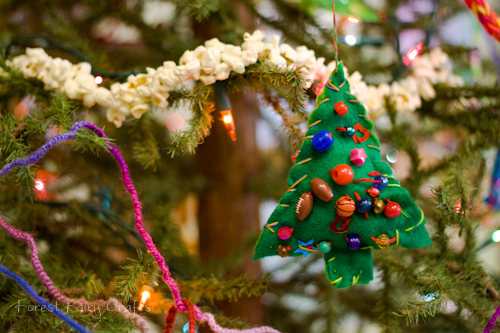
Download the free pdf tutorial here
The turorial shares how to make the ornaments with very young children who sew the needle through both pices of felt at once and add decorations to both sides. For the pillow-version, children decorate each side seperately. Then children sew around the edges, leaving a space for stuffing. Add stuffing and sew shut.

Or heart?
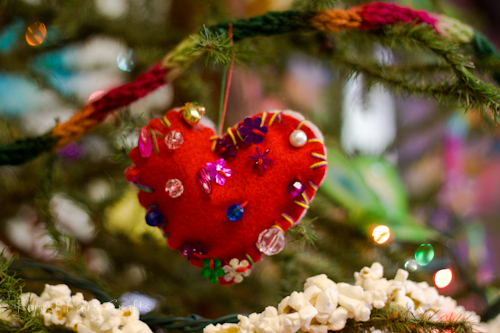
I love shiny happy beads and sequins.

Another quick idea that keeps children busy for awhile, and makes charming decorations for tree or windows (or gift tags), is God's Eyes. Once children pick up on the wind around pattern, they are hooked and will make one after another. The Magic Onions has a lovely tutorial posted here.

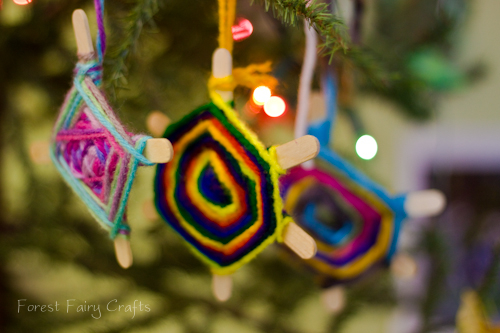
Trees and grandparents and parents love handmade ornaments. Have fun!
Oh, and just to share, our fairies from the Dragonfly Class (these take more than an hour):
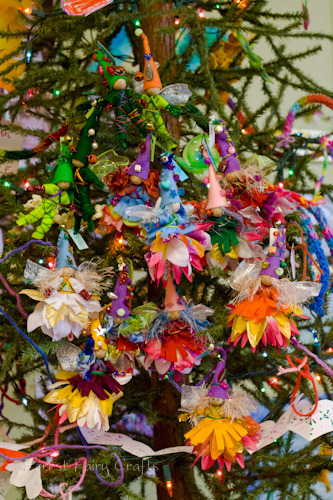
Sending you sparkles and magic as you enjoy the season!
Angel Collection
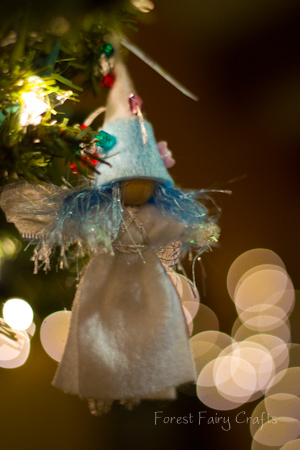
The angels are home for Christmas. I made these with our early-kindergarten students. Since I only see them once a week, we sewed the hats together and I assembled the rest. Their hats give them personality.
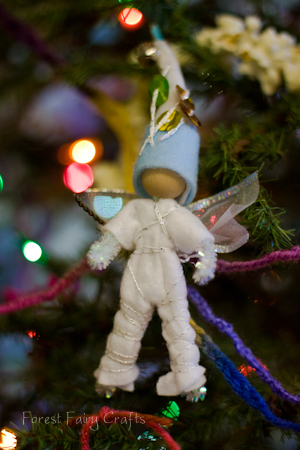
This little boy showed me that sequins with very long stitches are charming.
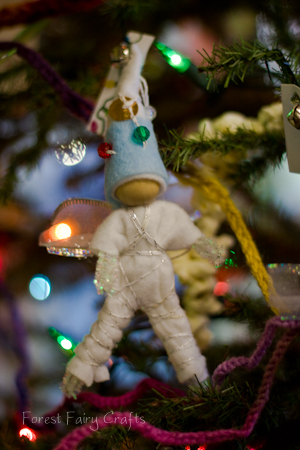
While this boy's fairy used many different stitches with lots of decorations. Each one became unique.
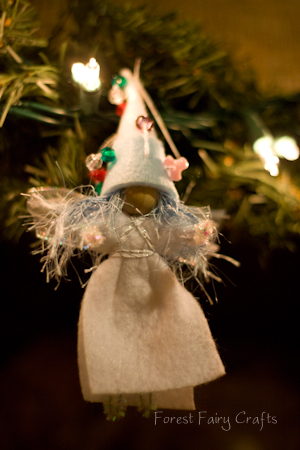
This girl put three beads on most stitches (look at the left side of the hat). She was very careful to choose a green, white, and red bead.
I hope that they will bring magic to the families who get to open them as gifts.
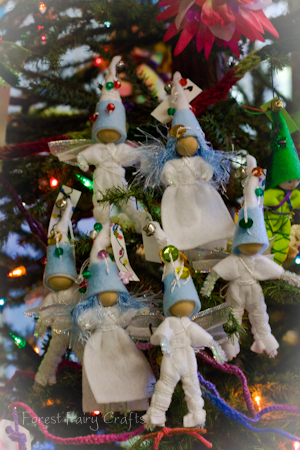
Sweet Angels :)

Elf Houses
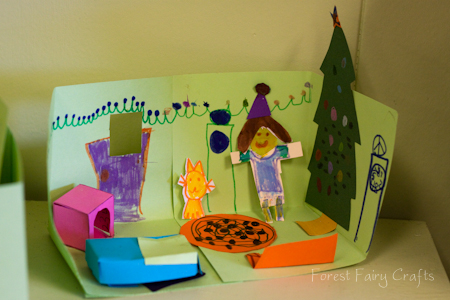
Make your own Elf Houses!
Click here for the pdf directions
Last week was a fun adventure in my Dragonfly class. I made rooms and the kids brought a thousand ideas. I saw a workshops, homes, and even a dance studio!
Once we had the walls, I gave the children lots of paper scraps.
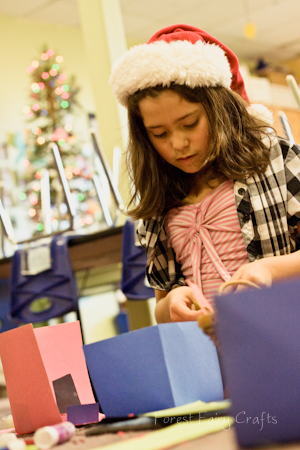
They inspired each other to keep adding more and more clever ideas. This was one of my favorite open-ended activities ever.
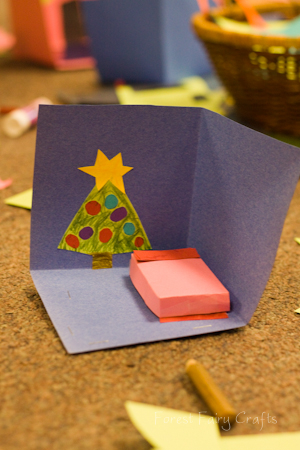
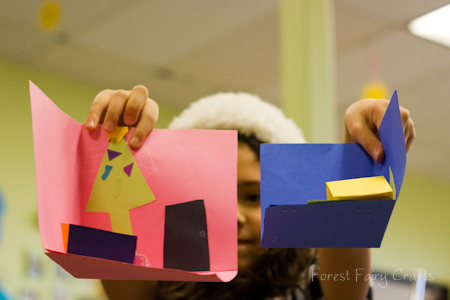
I helped make the beds and tables, but the rest was all their creating. And they got very creative.
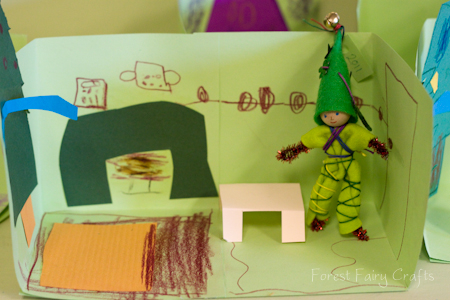
Then they realized their fairies and elves could live in the houses. How cool is that?
And my daughter stayed after school with her friends. She said a gnome lived in her house. Couldn't they make gnomes?
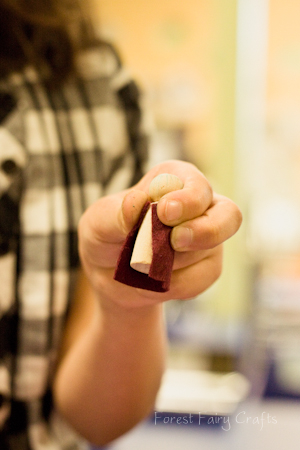
Of course.
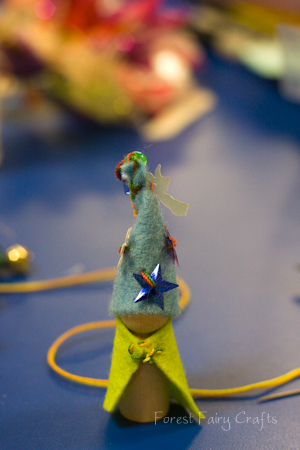
And every gnome needs a disco-dance room in his house.
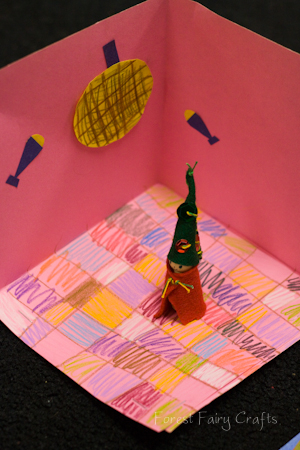
Elf houses quickly became elf-town. And elf-town is ready to celebrate the holidays. Happy holidays!
Christmas Fairies
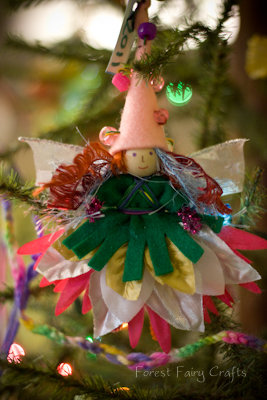
These faires were created by our kindergarten and first grade students at the Nevada City School of the Arts. We provide guidance, but they provide the magic :). Each fairy becomes a sweet reflection of the child who created her (or him). We made seventeen over the past three days. We hope you enjoy this glimpse of Fairyland.


Using the Waldorf tradtion of allowing children to imagine the faces . . . this boy liked his fairy to keep his fairy whimsical. I used to leave all of the faces blank, but students walked away and drew a face with the nearest pencil, then came to me crying when it wasn't what they imagined. So we compromise and I draw faces for most students.

And one Christmas Goblin (my student's words as he wanted red eyes)
Happy Holidays!
The tutorial to make the girl versions of these fairies is available in our Etsy shop. If you're interested in the boy version, send me a conversation through Etsy and we can figure out a way to help you (I haven't created his tutorial yet :)).
Many thanks to Miss Becky, Miss Marin, and Asia for helping make Fairyland possible!

Paper Lanterns
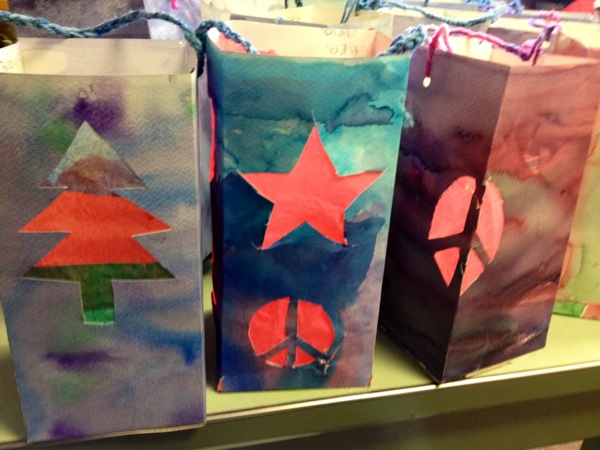
Winter in our Dragonfly kindergarten/first grade class is filled with fun and fancy projects. We are happy to share ideas. These tutorials are quick because we're all busy in the winter season. Feel free to ask questions. Enjoy!
To make these lovely lanterns, watercolor a long piece of paper. When it's dry, draw a line on the back about 1/2 inch from a wide edge.

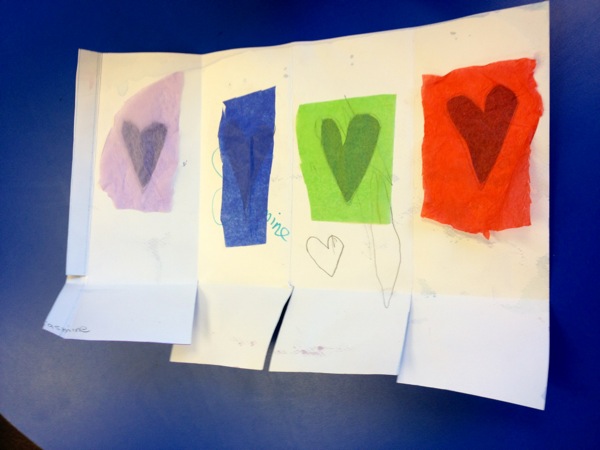
Fold in half to your drawn line. Fold in half again so you have four sections. Fold up a few inches along the bottom edge to make a base.
Cut along your fold lines on the bottom edge. Draw or trace shapes on each panel. Cut out those shapes to make holes.
On the back, glue tissue paper over the holes to make pretty glowing windows.
Fold the lantern again with the bottom edges overlapping to form the base. Glue along the 1/2 inch extra paper from that first line you drew in the beginning. Tuck that into the lantern to glue the four sides together. Let your lantern dry.
For the handle, we punched two holes and the children finger-knitted a chain to tie onto the lantern. We don't have our own finger knitting tutorial (yet) but I liked this one by Moonbeams and Applesauce. You could also braid or tie a few strings in a bow.
We use battery operated candles inside our lanterns. Fire can be dangerous.
These lanterns are a beautiful reminder of light during these dark nights. We hope you enjoy the crafting.
Many thanks to my co-teacher, Marin, for this gorgeous gift :)
Sew Sweet Felt Ornaments
Hurrah, the holidays are here! In our home, we celebrate each year with a hand-crafted ornament. They show us the years in a story. "I remember making this!" my daughter said with excitement.
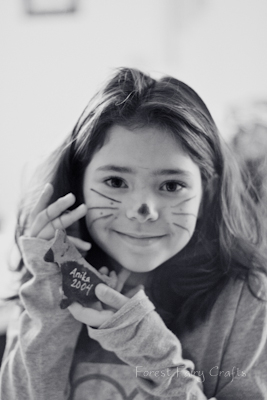
This is very impressive since she painted it when she was one :)
This year, we are sewing. My three-year-old sewed the beads and sequins on his tree.

Can you guess his favorite color?
I know he'll be reminscing about this tree in future years. And we want to share the fun. You can download the tutorial for these very easy felt ornaments. Children get to decorate both sides so it is a perfect first project for children learning to sew. Older children can trace other shapes around cookie cutters and get fancy with their stitching and decorating. We hope that you enjoy the craft!
Happy Holidays!
Click here to download the PDF tutorial
All tutorials are property of Forest Fairy Crafts for family crafting. We are happy to share the tutorial on your website if you link back to us. For other uses, please contact us. Thank you.
The Moment
Why I Sew with Children, Part 1: The Moment
It happens every time. I might be threading the twentieth needle, or cutting out the thirty-first piece of felt. And I wonder, "Why am I doing this?" Just about any other project would be easier. Painting, gluing, drawing. None of those risk injury.
Yesterday I questioned myself as I told the class that we would be sewing ornaments. I was with my youngest students, fours and fives. They could barely stand still to hear the two directions. I sew one-on-one with a child while the other children play or read or draw.
At this age, the children constantly bump against me. One tipped the bowl of beads and sequins before he chose his two colors of felt. "He doesn't know where he begins and ends," I said, smiling, to the class teacher.
And I was handing him a sharp needle? And holding the felt while he controlled the needle? Holding the felt is important for the youngest sewers (see our Magical Secrets). He didn't even want to sit down. He shifted weight from foot to foot. I took a deep breath. Here we go, I thought. I handed him the needle.
He studied it for a minute. The first stitches were shaky, barely looking at the felt before pushing the needle through. He dug around in the beads, at first just to hear the noise, then with serious intenton to find his favorite colors.

And then . . . then the moment. He sat down. His feet went still. He looked at me, really looked at me, then again at his work. And for the next few minutes. He was completely focused.

We shared a lovely converstation about colors he chose for his sister and mom and dad. He took the felt from me as his confidence grew. And he sewed with intention.
This is why I sew with children.

Because life is not all about Math Facts and Sight Words. Life challenges us to be focused, invested, careful, and calm. Life challenges us to give of ourselves, to see that we can make magic.
And sewing with children lets me feel magic. That moment is magic.

Tutorial for our Sew Sweet ornaments will be posted soon :)
*Please note: I mixed a couple of students together to write the story. Magic happened with the boy in the photos, but he was not the one that tipped the bowl of sequins :). I just want to be fair and true as I share :)
Giving Thanks
We are so thankful for you for visiting us and supporting us as we craft our fun little creations. We are very grateful!
We were inspired by Julie at This Cosy Life. She shared a lovely Gratitude Tree. A couple of us on Twitter (Julie and Tilly) shared the experience with our own families. The day before Thanksgiving, the kids and I painted with watercolors on both sides of the paper to make leaves. We found a couple of birch branches on the ground outside. We brought the leaves to our family gathering with the branches and colored pencils.
Then, as adults enjoyed each other's company, the kids got to work :)

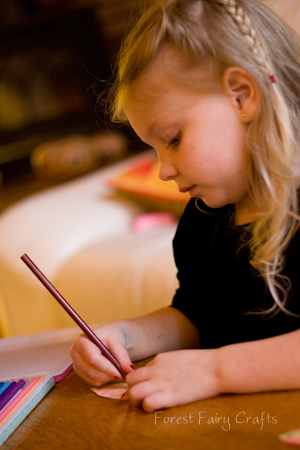
My niece, Mila, knew just what she wanted to write. My Mommy.
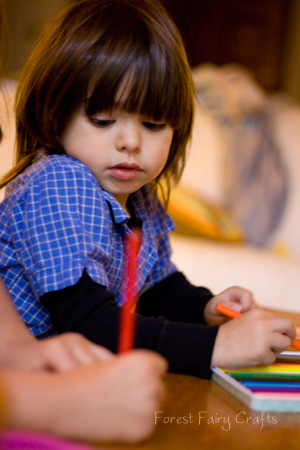
Ian looked to his sister for inspiration. His gratitude? Fire.
Even more than the actual project, listening to their conversations was rewarding. One idea led to another. Pets, family, friends . . . Anika wrote "I am thankful for life."
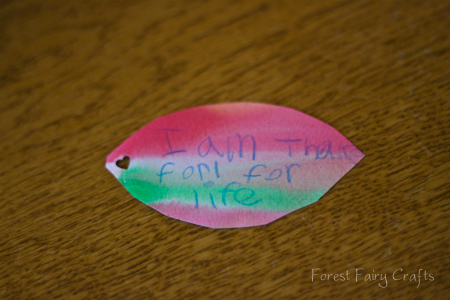
Noticing the simple things.
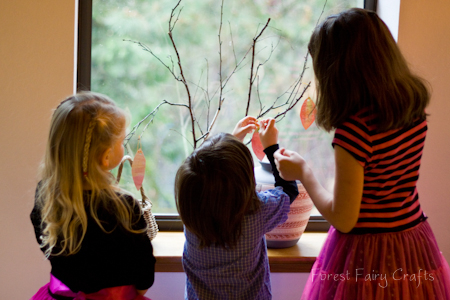
The craft itself was fun for them, too. With beautiful results.
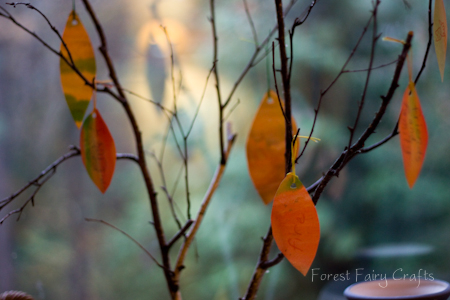
They loved their tree so much, we made room on the Thanksgiving table. Being careful of the candles, of course.
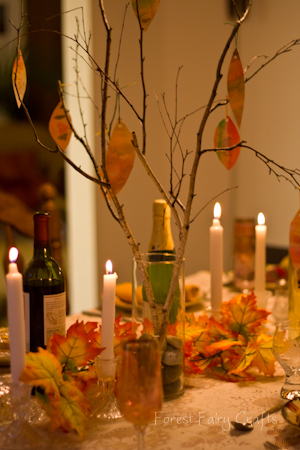
We brought the tree home. And I could say Thanksgiving is over, but this tree will be an ongoing craft. We can add leaves through the holiday season. After all, autumn is still splendid outside.
The energy might shift today (in some places) to Christmas, and all the abundance and wanting of that holiday. After all, Christmas can be about gifts we want. While this tree is about the gifts that we already have. Each and every day.
I think I'll also tuck the leaves away to bring out again next year. So we can build and reflect. Be thankful for this wild and precious life :)
Fairy Ninjas
We traveled to my nephew's birthday party recently. We made leprechauns last winter and I made the Fancy Fairy Family for his family. He loves the magical world. So much that they have searched for boy-friendly versions of crafts that are not made by Forest Fairy Crafts. My cousin/sister bought one that she said was impossible for him and a challenge for her. "Help," she said, "We need more boy-fairies."
He inspires me. And my own children, of course. They all love ninjas.
So I had a few questions. Pointy hat? Cover the face? Paint the head? How do I make a ninja that still belongs in Fairyland?
Then I found these wings in the scrapbooking section of the the craft store. At first, I wasn't sure what I could use them for, but I loved the ribbon. Then I was puzzling through my ninja-ideas and, ta-da, inspiration!
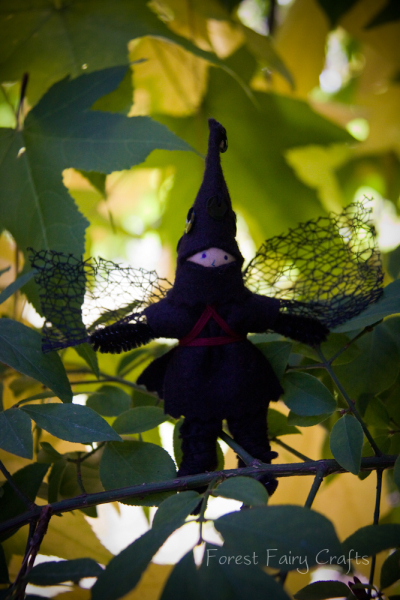
Anika needed a girl version, of course. She collaborated with me. Her fairy needed hair, skirts, and eyelashes. Of course. I wrapped her ninja's legs with black yarn to make leggings. Ninja-girls are very active.
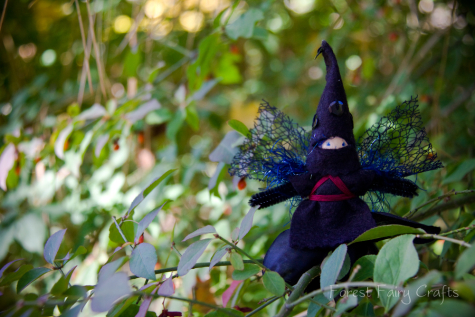
I had a solution for the faces, too. The hats pull down and tuck under the chin so ninjas can eat and smile :)
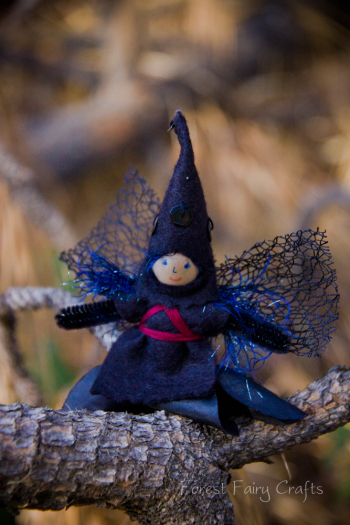
The ninjas played a lot at the birthday party, and they all live on nightstands now. A fairy ninja could protect you from any stray nightmare, right?
The Holiday Catalog
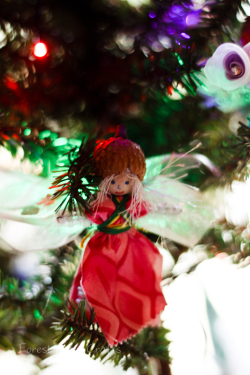
It's been quiet online, but we've been busy in the forest! We have a happy announcement coming soon (can't wait to share, but we have to wait a little longer).
Luckily we don't have to wait any longer for this announcement. The Holiday Catalog is here! We are often asked about what we create, so we figured we'd make an easy way to browse our crafts. The catalog has kits and finished crafts. Everything is made by hand by Asia and Lenka with love.
This is our first catalog, so thank you for being patient with us if there are mistakes. I will post as we sell out of items (which we did last year). I will only be crafting a few fairies this year, so let me know soon if you want to be on the list.
Forest Fairy Crafts Holiday Catalog
The order form will not let us type into the form fields, so you can print and give it to us (if you live in Nevada County), or simply send us an email with a list of your choices. We'll figure out how to make it all work out :)
Happy Holidays!

Halloween Skirt
Just in time! I finished the tutorial for the Halloween Skirt! Of course, the skirt can be made any time of year with different fabrics.
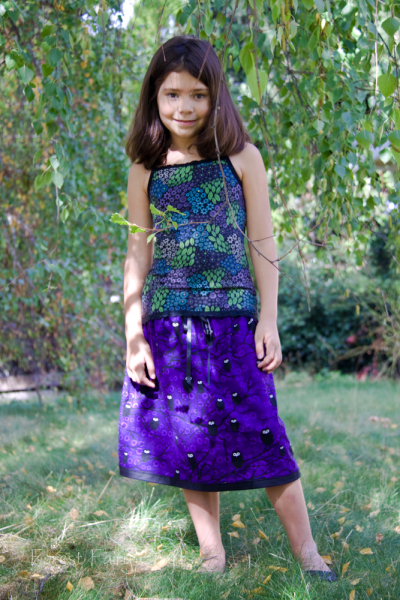
The fabric inspired this skirt. Black owls with white eyes sit on winding black branches. Anika has already taken it twirling :)
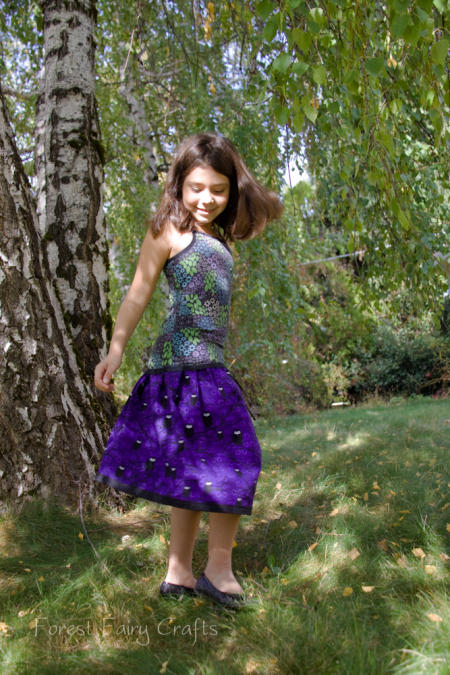
I have a feeling we'll be seeing the owls all winter :)
Our free tutorial has photographs for each step. Enjoy!
Click here for the Halloween Skirt Tutorial pdf
All tutorials are property of Forest Fairy Crafts. Please contact us for use permissions. Thank you!

In case you are wondering why is says Sweet Little Skirt #2 when you cannot find #1. . .
I took photos of another skirt project over a year ago and never got to the tutorial. This skirt will be #1 :). Hopefully posting soon :)

Moody Pumpkins with Groups of Children
On Tuesday, I sewed the Moody Pumpkins with the youngest students at our school. I am the art teacher on those days, and their all-day teacher was a little skeptical when I said I was bringing sewing into the classroom.
"With real needles?"
Yes. Real needles.
Because this is precious.
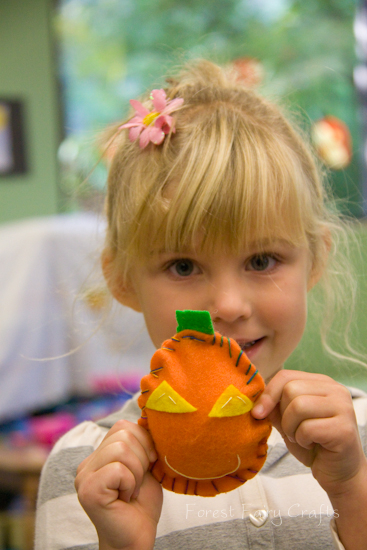
But I don't walk into a classroom with a pile of felt and a pincusion prickling with needles. No, that would be a disaster. A big part of crafting with children is being prepared. So, to get ready for this project, I was busy the night before.
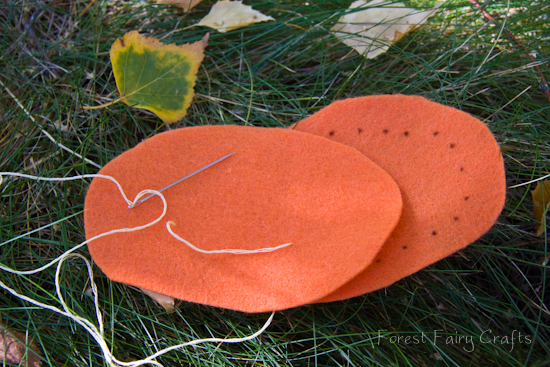
- Thread 15 needles with the outside thread (in this case, variegated rainbow crochet thread- see our Supply Hints)
- Cut pumpkins (back and front)
- Cut stems
- Cut lots of little yellow felt triangles so children can choose
- Thread needles with yellow embroidery thread for the face (though I learned that the rainbow was cute, too, when I was short one pumpkin the next day)
- Sew the mouth by knotting, pulling through, testing to make certain that it will fit, then knotting loose on the other end of the mouth so the pumpkin is ready for eyes.
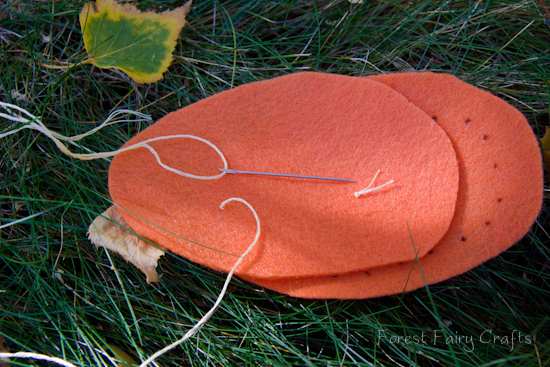
- Leave the threaded needle with the pumpkin- tuck into felt so it won't prick anyone.
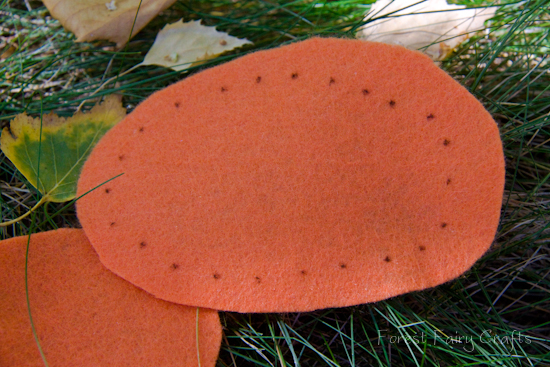
- On the back of the pumpkin, draw little dots for each spot the child will place the needle. This turns the sewing into a dot-to-dot, with the needle always poking into the next dot (whip stitch).
- Safety pin it all together with the smile on the outside so the children can choose their pumpkin.
- I do not try to make them all look the same. No, the fun is in unique pumpkins!
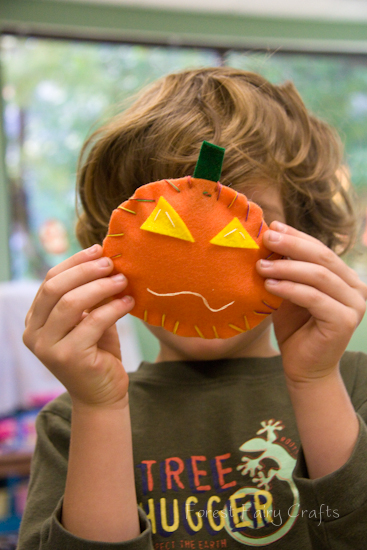
Some were tall and some were wide. All became special :)
I chose felt for the eyes on this project because it was faster than buttons. The child chose the triangles and an adult sewed the eyes on with a few stitches. We tied off the yellow thread. We sandwiched the stem between the pumpkin pieces. We used an already-threaded rainbow needle and did the first couple of stitches to anchor the stem. Then we modeled a stitch or two before handing the needle over to a child. We work one-on-one with children this young because most need us to hold the felt (see Tips & Tricks).
They sewed about 3/4 around, then stuffed the pumpkin and sewed it closed. Many students were amazed.
"I thought we had to glue it."
And, "I made a stuffie. Look, look, I made a stuffie!"
My favorite quote came from this little guy.
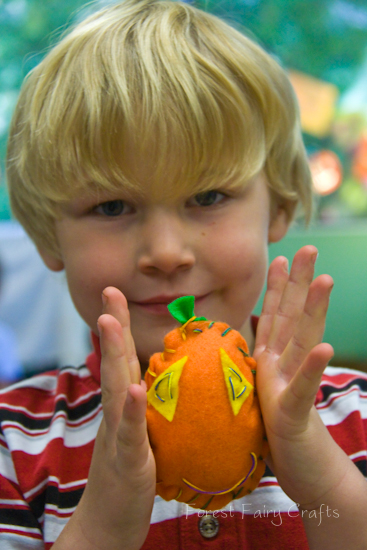
You can't hurry when you're sewing. The needle is sharp. Sewing is a quiet activity.
Why do I sew with children? Slowing down is precious.
Have fun! The Moody Pumpkin tutorial is here as a pdf download. All tutorials are property of Forest Fairy Crafts. Please contact us for use permission beyond sharing with friends and linking back to our site.
Fancy Fairy Witch
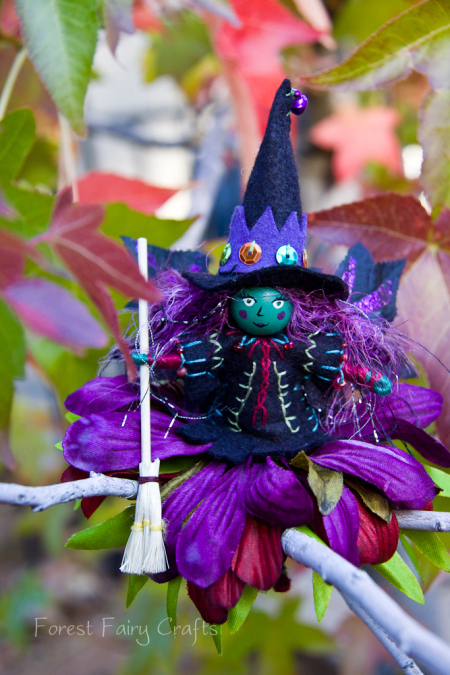
My fancy fairies inspired a friend to ask, "Could you make a fancy witch?"
Yes, yes, yes. I'd love to craft a fancy witch. And she was delightfully fun to create. Magic :)

