Wishing Heart
Let's begin with a wish. A hope. A dream. Let's made crafts to celebrate our wishes. Because the best wishes are from the heart.
This was my first sewing project of the year with second and third grade students (7-9 years old). Most had used needle and thread before. I wanted a project that would let them explore. A project that let everyone be successful. Whether they wanted one decoration. Or a hundred and one :)
Supplies:
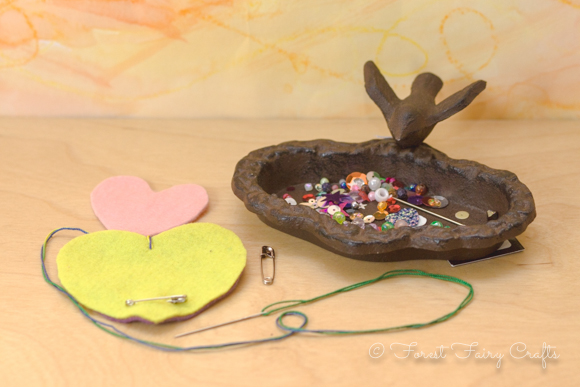
- Felt (two colors for each heart)
- Needle and thread (chenille needles and crochet thread)
- Safety pin
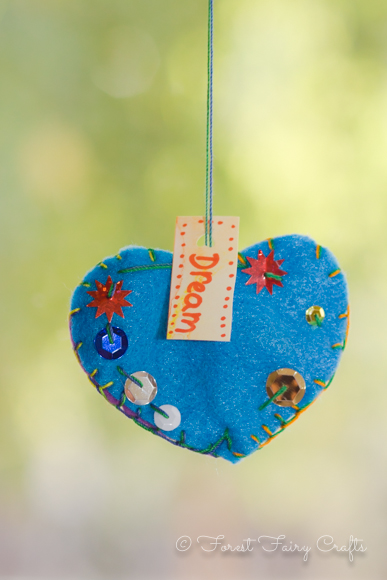
- Beads and sequins
- Slip of pretty paper for name and wish
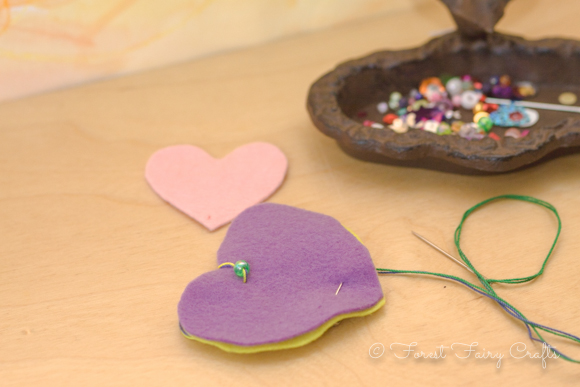
- Optional: a third, smaller felt heart to decorate
Age: 6+
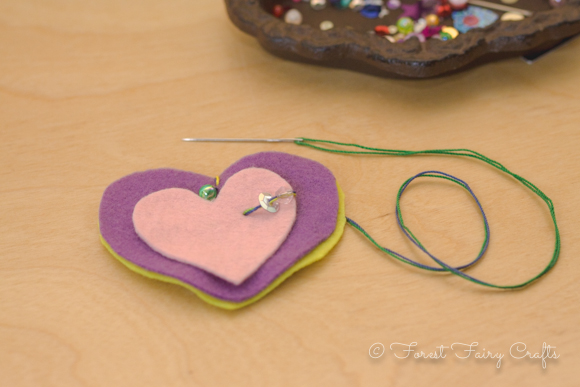
Prep: Cut hearts. Secure them together with a safety pin. Double and knot thread on the needle. Sew one stitch at the top hiding the knot between the two hearts. The stitch and the safety pin keep the felt together while children sew.
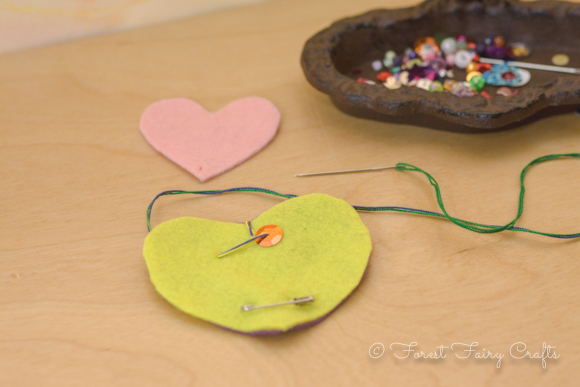
Children: These hearts are a lovely first sewing activity because almost everything is beautiful (expect for tangles). Children add a bead or sequin to one side of the heart. They push the needle through felt anywhere they like. Big stitches work just fine.
Now the needle and thread is on the other side. Add another sequin, bead, or both.
You can also add the little felt heart. Be careful when going through three layers of felt. It may take a little practice.
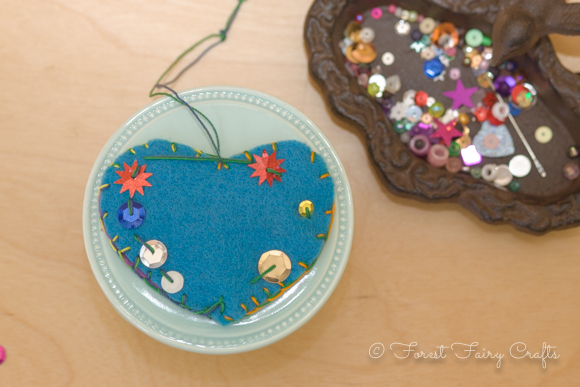
Add all of the sequins and beads that make your heart happy.
Helper: Just encourage. Sort out any tangles. Take off the safety pin once the two pieces of felt are secure.
Most design choices will be fine. Long strings of beads. Loops around the outside of the heart. Crisscross stitching. It's all okay. This allows children to experiment with sewing. And have fun! They can stitch around the outside if they like, but it's not needed.
Tie a knot. Move the string to the center for hanging if there is enough string left. If not, add a string. Many children strung beads on their hanging thread to catch the light. If beads go on the hanging thread, be sure to tie a knot around the last bead so they don't slip off.
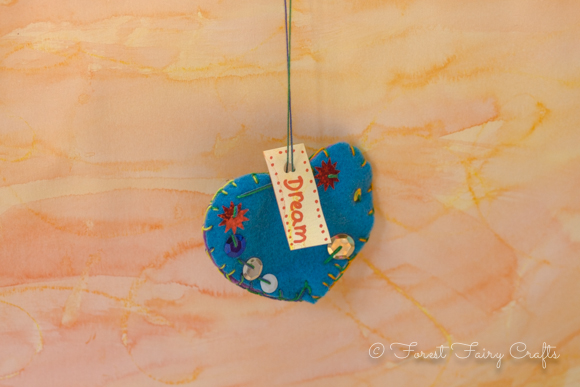
Children: Write your name and a wish on a pretty slip of paper.

Each class hung their hearts in a special area of the room.
One is lovely. A collection is gorgeous.
Have fun sewing this week!
For more insights about sewing with children and teaching children how to sew, consider our Forest Fairy Crafts book. It shares our favorite needles and threads along with stitches, troubleshooting, and more. The link is an affiliate link. Should you decide to purchase, a small amount returns to the Forest. Enjoy :)