
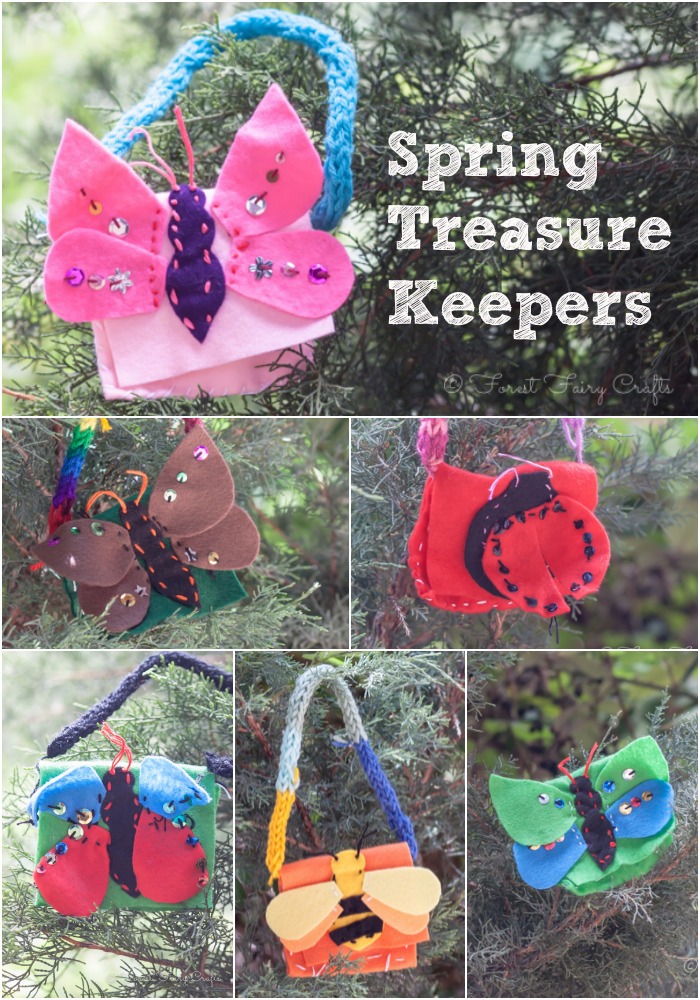
Spring Treasure Keepers
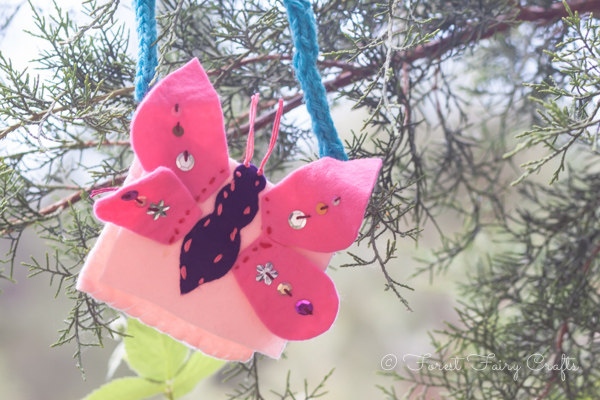
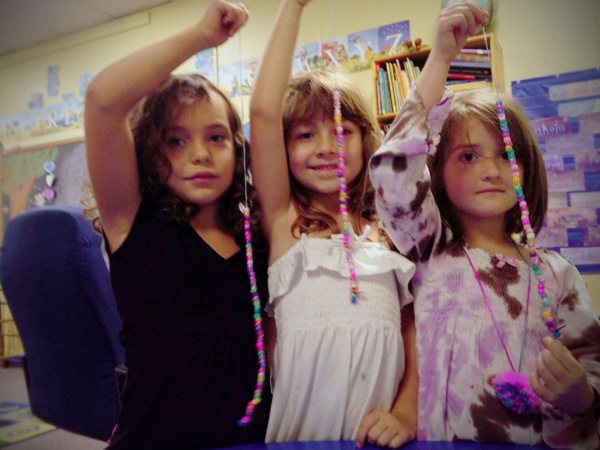
Spring means longer days, sunshine, and outdoor adventures. Every adventurer needs a place to keep stones, shells, and little treasure. Asia designed the perfect project for spring. First grade students (6 years old) at the Nevada City School of the Arts sewed these wonderful Treasure Keepers.
Aren't these adorable?
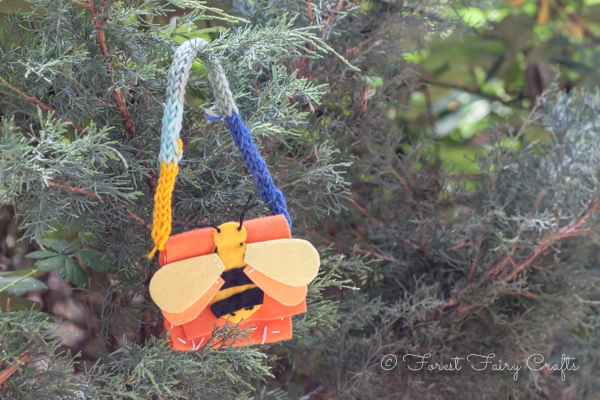
The class was studying insects. Each student chose an insect to feature on their treasure keeper bag.


Butterflies were popular for decorating the little bags.
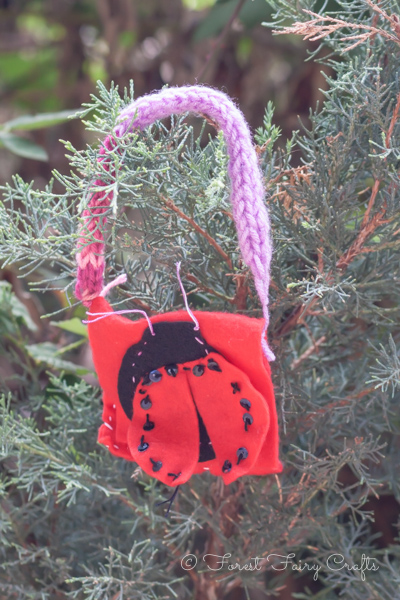
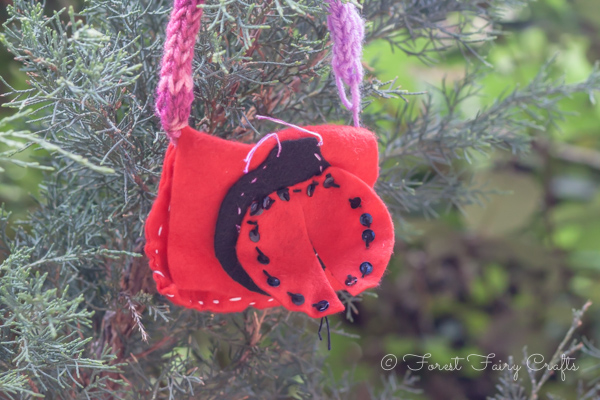
Asia and I both love the Ladybug too :)
And this little one is so original. He's a little tricky to photograph with the black on dark blue felt, but he's an awesome beetle.

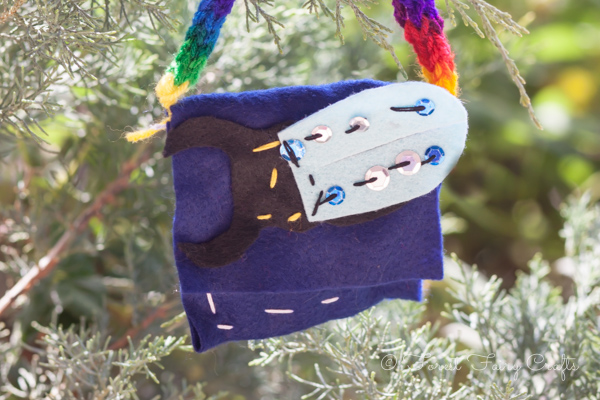
So cool!
Asia made the bags using the pattern on page 123 of our Forest Fairy Crafts book. The handles were created with fingerknitting, shown on pages 124-125 and castle-knitting. Castle knitting isn't in the book (sorry!). We are working on a tutorial for making your own. Or you could use one like this
.
The children have lots of ideas for going on nature walks to fill their bags with found treasures. Welcome spring!

*Please note, this is an affiliate link. Should you decide to purchase, a small amount returns to the Forest while your price remains the same. Win-win. Thank you!
Happy Spring!
Playing with Craft
Children love inspiration. Don't we all?
Making toys inspires children. They delight in the power of their hands and ideas. I recently sewed these lovely baby leprechauns with six year old students. Children sewed all their own sequins, around the fairy baby, and added stuffing. They were delighted with the little toys they made.What a treat, to see that magic through their eyes. Look what we can create!
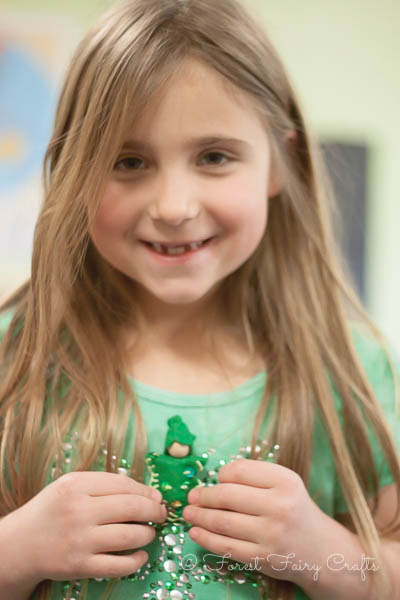
Sorry this one is a little blurry- classrooms have tricky lighting for my camera :)
Then the children reminded me the real fun of sewing and crafting. Crafting is inspiration. And the craft is just the beginning. Crafts inspire play. And play inspires storytelling. And learning.
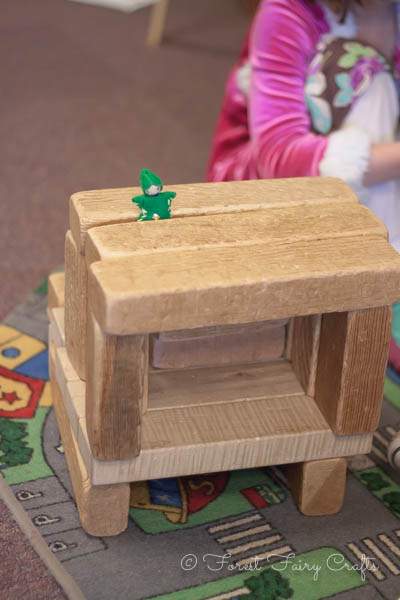
Now that they had little friends, they needed houses. What could build a house?
Blocks of course!

And some homes need a diving board into a lovely cool pool.
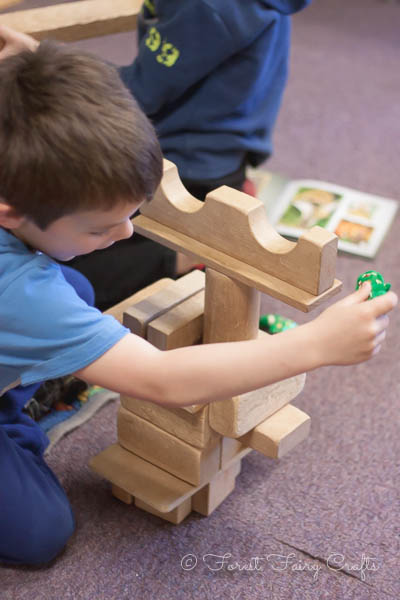

With a luxury view from the bedroom.
Legos also make awesome homes. With an open door :)


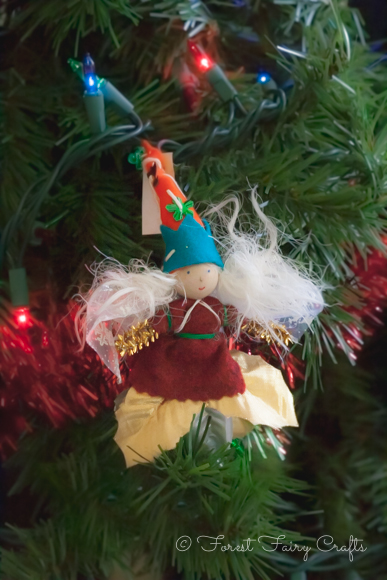
I encourage students to leave blank faces so they can imagine any expression, but a few insist on adding features. I let go when they have strong feelings towards needing eyes or mouths. After all, if I wanted it to look 'my way', I would make my own :)
I loved her idea to put a ring over the ruffled hat for an even fancier crown.
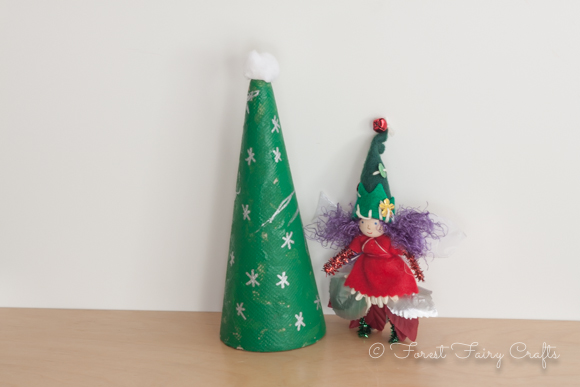
And finally, dollhouses are wonderful homes. Especially when they come with a pet tiger :)

Enjoy what you create!
Happy day :)
Many of our crafts are "Keepsake Crafts", meaning they look nice for years and become a treasured memory alongside the sweet sewing. Every now and again, I sew "Process Crafts" with children. These are the crafts to shove in pockets and forget outside after playing in the trees. They are the crafts that are meant for playing. They are a chance to let go. Don't worry overmuch about colors or forever. Let them become a memory. Become part of a story. Have fun crafting and playing :)

P.S.- if you would like detailed directions for making little fairy/gnome friends, check out our Forest Fairy Craft Book. Please note- is an affiliate link. Thank you from the forest should you decide to purchase one! Directions for the little hats are online here. Enjoy!
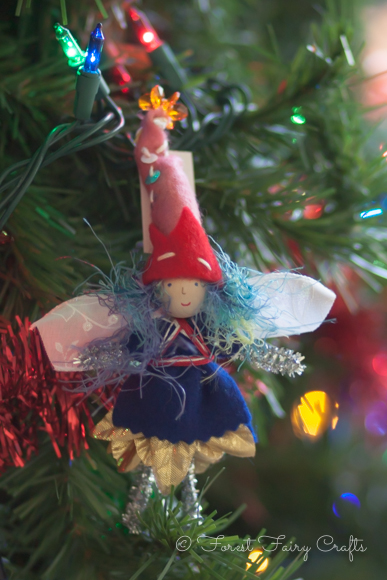
Child-Made Fairies for Christmas
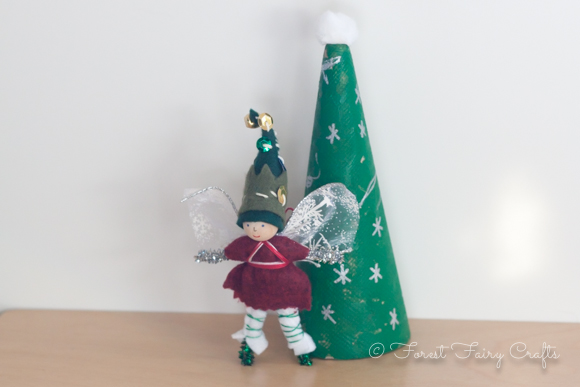
One of my favorite things about the holidays is making fairies with children. Every student in my class (20 in all) makes a fairy. The boys (and a few girls) are not inspired by fairies, so they make elves. Or angels. Whatever the fairies are called, they bring joy to the season.
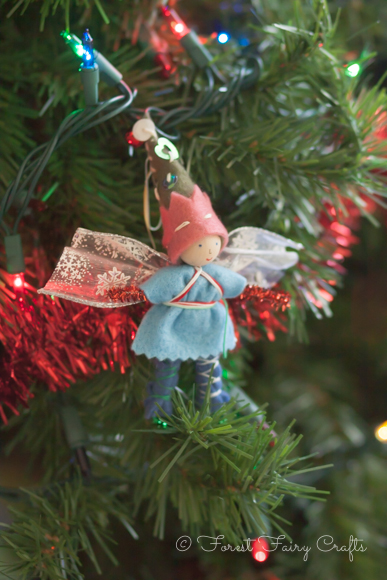
Our book was inspired by projects like these fairies. Because families sometimes wonder how their five, six, or seven year old made such treasures. Every little fairy/elf/angel is unique. Reflecting the unique voice of the child.
How does it work?
The directions, with many photographs, are all in our book. What the child makes and what I make depends on time and the child. Some children show great independence and want a lot of creative freedom. Other children enjoy having my attention for each little step. I do have a plan for creating twenty child-made fairies. I am working on a post for sewing fairies with groups of children. For now, though, I want to share my secrets for working with one child at a time. Because I get to make these with family, too.
What the child does:
- chooses felt and pipe cleaner colors, yarn, sequins, wings
- sews the decorating felt band on the hat, adds sequins and decorations galore
- sews up the back of the hat
- adds beads and bells to the top of the hat
- winds thread (pants or tunic)
- chooses petal skirts
- tries hat on to see how it all looks together
What the adult does:
- makes the body
- draws the face
- cuts the felt
- threads the needle and ties knots
- demonstates (models) the first couple of stitches and how to add sequins
- lets go of expectations :)
- folds hat in half when decorating is done, sews an anchor stitch at the bottom
- models sewing up to the top of the hat (one stitch)
- knots thread for clothing
- models first steps for winding thread (pants or over-shoulder, under arm)
- holds wings until they are attached with winding thread
- clips tiny amount so petal skirts can scoot up the legs
- glues hair and hat on fairy/elf/angel
Of course, this all changes depending on the age and personality of the child. And it doesn't have to be done on the same day. Take breaks. See the little bits of felt and thread come together to create a magical keepsake.
One of our favorite things at the recent craft fair was hearing from families whose students left us five or even ten years ago. "We still have our fairies," they said. On the tree or the table or the mantle.

We still love our fairies :)
Thankful for Nature

Our world is amazing. Whether we live in a forest, or a meadow, or a city, magic is right outside our doors. This time of year, we love talking about gratitude with family, friendships, food. One of my personal favorite actitivies is bringing children outside and asking them, "What do you appreciate here?"
Having things to touch and explore and collect helps children notice the world that can easily be taken for granted. We can walk past trees or building. It's easy to focus on the destination: going to school, to the park, to the store...
This time I just go outside. I invite children to collect one treasure (maybe two). I wander. On purpose.
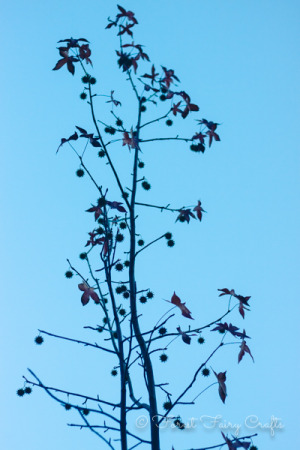
We look up.
We look down.
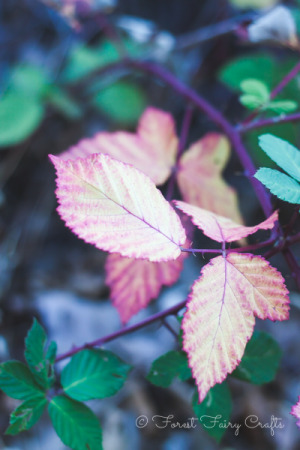
We notice the passing beauty all around. And we ask questions. We become curious. "What are the spiky things on that tree?" "Why do these leaves change colors?"
This appreciation is simple. And lasting. Children share their treasures.

I love photos because I can take a picture, then they can leave nature in the forest (or side of the parking lot, which is where he found this tiny pine cone).
They are so excited by their discoveries.

We slow down and notice how the air feels. How does the sun feel on our face? The breeze in our hair?
We are so fortunate, to have these gifts around us every day. No small things.
When we finish the walk, we write poems to remember those feelings. Those discoveries.
To remind us. The world is an amazing place. We have so much to be thankful for :)
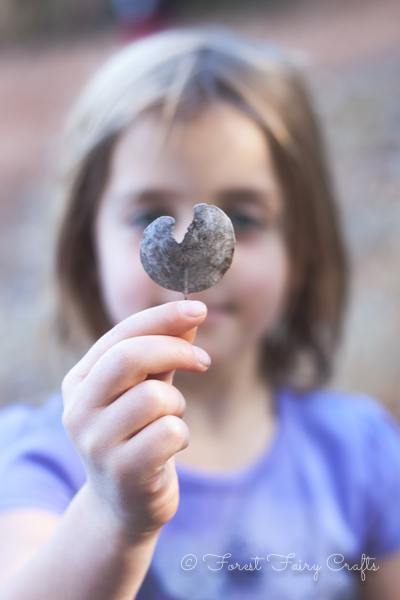
She found a leaf shaped like a heart.
We also place our treasures in a display. Since we are a class, one or two things from each child create a diverse collection of leaves, acorns, and tiny pine cones (these are returned to nature within a few days). With my family, each child collects a little more.
I have ideas to look for colors as we wander. Appreciate red in our world. Appreciate green :)
Appreciate now :)
I write the poem with them by asking for feelings, not stories. Their individual contributions create a lovely poem :). I usually write the closing sentiment to tie it all together.
- Take a walk
- Wander
- Slow down and share the moment (say how it feels)
- Collect treasures (gently, no living things)
- Create a display
- Draw or paint an image of a favorite treasure or scene
- Write a sentence about the walk or what was discovered
- Write poems (or a group poem)
- Put photos, drawing, and/or poems togegther for a fall book
P.S. If you would like to bring a fairy along on your walk, that would be lovely! Give your fairy a tour of our magical world :)
Enjoy autumn :)
The First Fairy Mobile

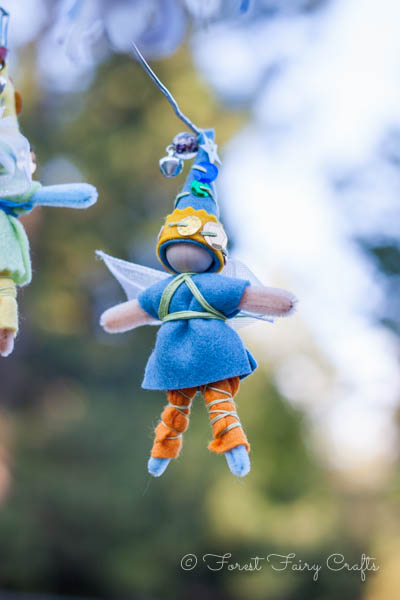
Last month, I wanted to create a gift with our class of kindergarten and first grade students. Our beloved teacher was going to have a baby! What a perfect chance for me to try a long-time idea. How could I make the fairies into a mobile?
This was the perfect gift. Each student helped with one of the six fairies. We didn't know if the baby would be a boy or a girl, so we kept neutral colors. I chose the felt and cut the pieces before we sat down to sew- orange, blue, yellow, and green. The children helped sew hats and sequins so we had three girls and three boys.
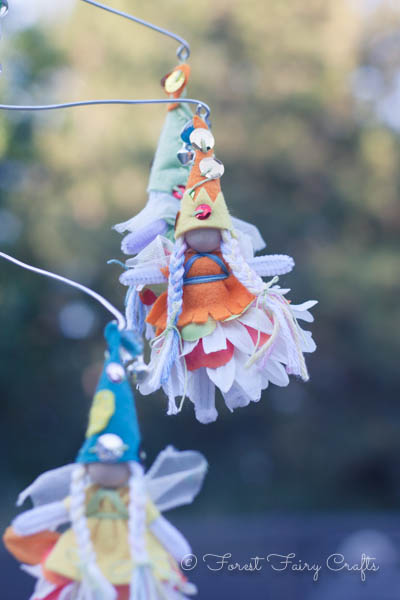
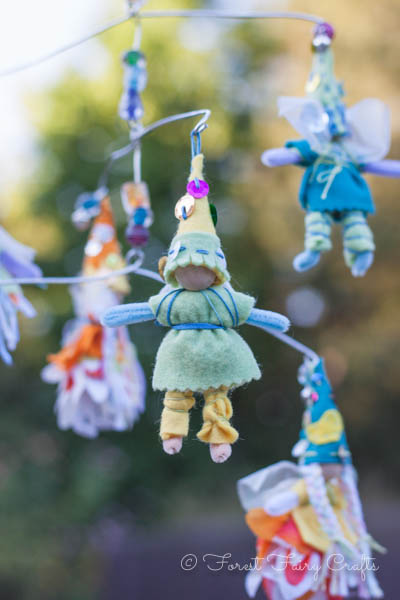

I also kept the thread choices blue or green. This way, the fairies looked similar with their unique personalities. Children also chose the beads for the hat that would end up matching the beads I used to connect the wires (I didn't plan that ahead of time, but it worked out perfect).
Once I had the six fairies, I used floral wire and the heaviest beading wire that I could find in our local craft shop. The beading wire was pretty, shiny, and soft. The floral wire was thin, but strong. I ended up using both wires. I liked the 'character' of the softer wire. The uneven bends here and there just added to the charm. I used beading pliers to make simple loops at the ends and the center. Each wire balanced with a girl and a boy. I attached these together with short pieces of wire. I felt like the middle sections needed a little something, and the beads were a perfect solution!

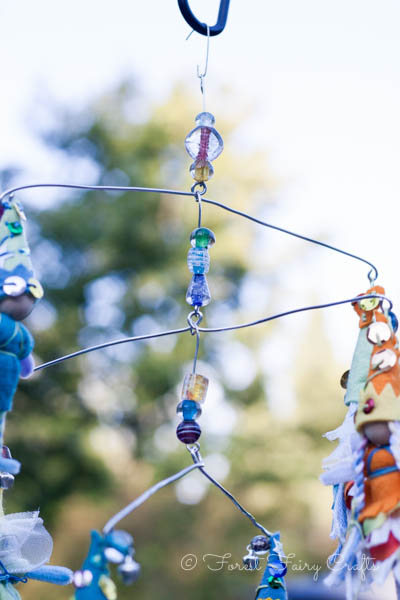
I could make a tutorial if people are interested in all the details of putting the mobile together. My magic was seeing how each child contributed to a collaborative gift. I have wanted to make a fairy mobile for ages! I am glad that I got the perfect opportunity. I have also seen lovely mobiles using a hoop. I would love to try sticks, too, for the natural elements.
I loved creating this fairy mobile with the children. We hope the baby loves our hanging Fairyland!
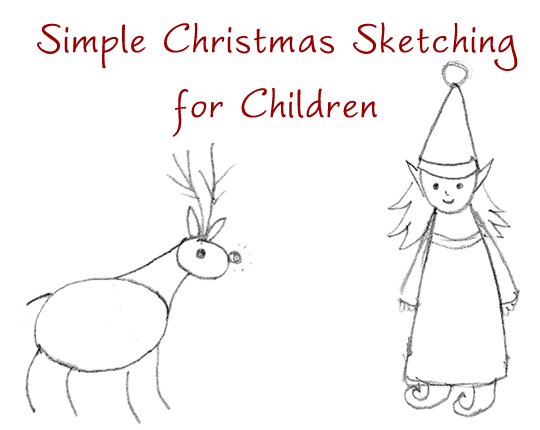
Christmas Sketches
We draw a lot in our classroom. And, every year, students ask me for help.
"How do I draw an elf? How do I draw a reindeer?"
As often as possible, I encourage their own ideas. "What shapes do you see? Where can you start?"
My students are 5 and 6 years old. Especially around the holidays, overwhelm may rise up at any moment. So this year I decided that a little inspiration could go a long way. I made simple sketches for them in an easy, one page format.

Clicking on the image will bring you to a larger size you can print for personal or classroom use. I also have a PDF you can download with both pages.
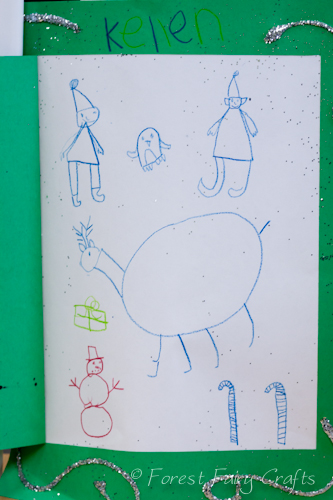
At first, I planned to fill the back-page with more drawings. Except I ran short on quick, easy ideas.
Then I had my own inspiration. Words!
Of course! Children love to make cards and decorations. They could use a word-bank for holiday ideas.

As often as possible, I used a visual cue to help show the written word. This helps our early readers.
We realized that I forgot an angel and train along the way, so they are on the back too. I print these out double sided and keep them available throughout the season. Children love to color them and use them for project ideas. Children usually take my basic shapes and create with a lot more detail in their finished projects.
So fun!
Please be aware, I drew these with student-help after school in pencil :). They are a little rough through my eyes. When I scanned them, the pencil transferred light so they may not print perfectly. If I wait to make them perfect, though, they will never be posted for you :). Also, the light writing gives children a nice chance to trace letters!
I hope these sketches inspire us to create more winter scenes. Let's draw together :)
Enjoy!
Christmas Sketches and Words PDF Dowload
All resources are property of Forest Fairy Crafts. Please contact us for commercial use permissions. Thank you!
Gratitude to Day 5

We wrote sweet ideas to catch up over the weekend. They were thankful for their pets, their school, and their imaginations. And their friends. Once the ideas start flowing, they cascade into a beautiful collection. I look forward to seeing the new page tomorrow. I hope you are keeping your books writing a little each day. We will get there together :)
Best wishes!
Gratitude Day 2
Students love this project! We wrote a few pages today since we won't see each other over the weekend. We also had gratitude circle today. They veered into silly-land for a little while with "I am grateful for my hair, and I am grateful for this candle." Then one boy had that wonderful moment where he said, "I am grateful for my hair and for my eyes and for myself."
Our page for the day!
Gratitude for ourselves. After all, we are, all of us, miracles :)
Wishing you a joyful day!
Pirate Week Adventures
This year I focus on a mini-theme each week in the Dragonfly Class. We are a kindergarten/first grade class. Our activities become a rotation during Groups or a whole class writing adventure. Activities need to be very flexible for many different skills. And my goal is high interest opportunities for learning. I want them to take these activities home and add to their ideas.
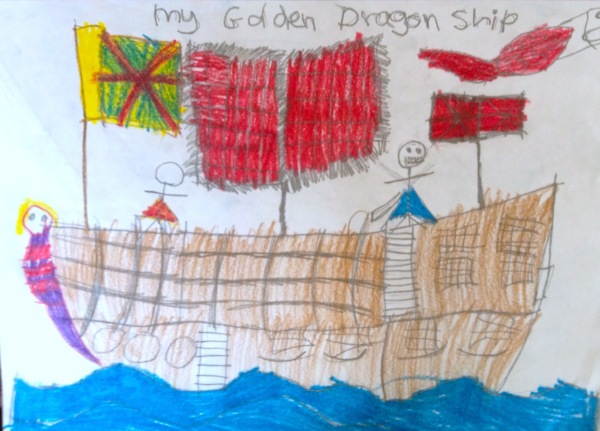
My hope is to have photos to share, but that didn't happen for Pirate Week. Too busy :) ... Wait, I have their ship drawings to assemble the Pirate Fleet Book. I took two photos to add, hurrah.
I still want to write our activities to capture them for the future, because I know I will sit down next year and think, "Now, what did I do last year?"
Pirate Maps: I cut brown paper bigger than usual so they could roll their maps. These turned into spyglasses very quickly. We marked the treasure and drew a path to find the treasure along with landmarks. Children loved these outside at recess.
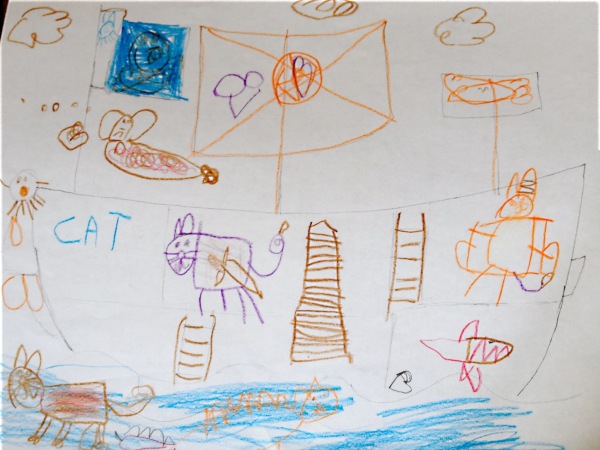
Pirate Fleet: I drew a pencil sketch of a pirate boat very simply and made a copy for each child. We discussed how pirates lived on boats and had to bring everything along with them. Each child then got to design their own fantasy ship. I drew with a cut-away design so they could show me the Captain's Quarters and add a hot tub if they liked. Some chose to color the outside of the ship, which was fine too. We had Kitten Ships and Ninja Ships and Mermaid Ships. Children became very creative and excited about the adventures these ships would find. Which led to....
Pirate Fleet Stories: I met with each child so they could tell me the story of their pirate boat. We had danger, beauty, and adventure on the high seas!
Pirate Flash Fiction: This was an idea that I had for groups for a shared writing project. What is each student wrote (or dictated) one sentence to their parent helper at group-time. At the end, we would read the sentences for a story about the Dragonfly Pirates. We had a lot of treasure-hiding and treasure-seeking and battles with Kraken. The children loved hearing their separate pieces come together to make a whole story.
Bonus topics during our two days (yes we did this is two days since I teach part time) included discovering the world, monsters of the deep (giant squid), and pirate discipline. Pirate captains gave time-outs too! Except they tied someone to the mast for awhile. We didn't go into great detail about pirate discipline, but the children found boat-life fascinating. I became the pirate captain and they all called, "Aye, aye, captain!" when I gave a direction like, "Wash hands for lunch."
Oh, and we talked about pirate flags and communicating on the high seas. Cell phones didn't exist in pirate-times so they needed to announce their arrival in a scary way. Children were fascinated by the idea of using images to communicate. They enjoyed designing their own flag on their pirate ship for the pirate fleet. I could make this a separate activity and even use fabric to create flags.... Another year :)
I also had the idea to develop a pirate persona with a chosen name, outfit, and companion (pet). This could connect to the pirate boats. So many ideas! And the children loved it because the idea of sailing the high seas searching for gold is always an adventure! Not to mention, sprinkling a few arghs! and avasts! into everyday sentences is great fun!
A pirates' life for us :). I am glad I remembered to write everything down.So this was a lot longer than I expected. We packed a lot of pirate fun into our days! I hope you get to enjoy life's treasures today!
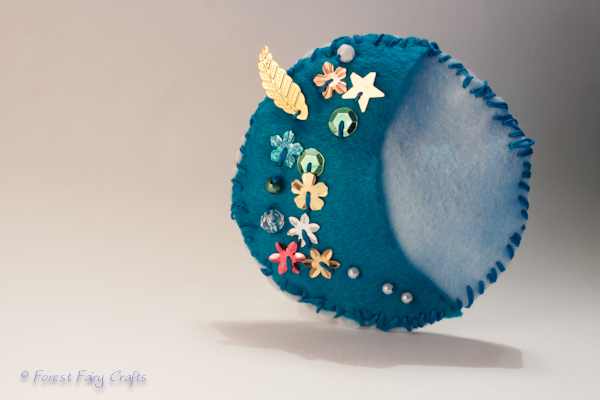
Moon Pocket

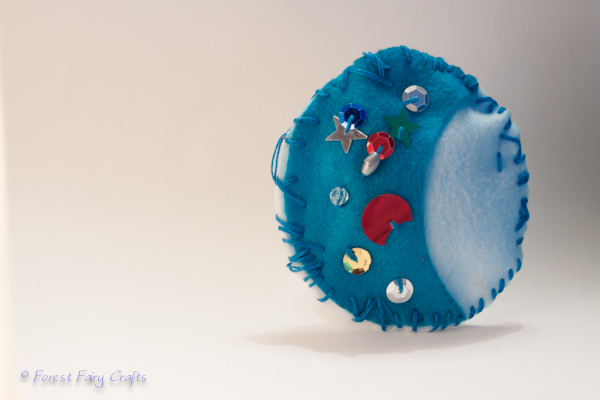
These Moon Pockets brought sunshine into my day. Students in our first grade class sewed these beauties. I am in constant awe how we can provide students with the exact same supplies and directions, yet every project reflects the crafter in colors and stitching.
Before sewing, we discussed treasures. The moon on the front is a pocket where children can keep teeth for the tooth fairy or little notes or any little keepsake. Our last step is stringing a little ribbon to hang them.
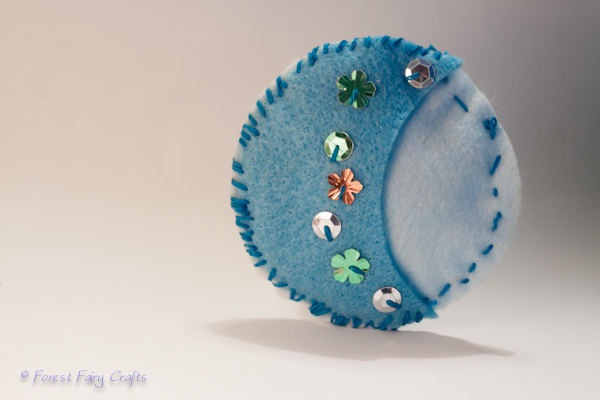
Children are careful, conscious crafters. This moon has a pattern of flower, moon, flower, moon. This meant choosing them from the bowl of mixed-up sequins. What a lot of work!

A big challenge for grown-ups helping sew is how much to help, and how much to let go. Hopefully these images might inspire Letting Go as a help-strategy. Even wild stitiching is lovely!
At first I thought I would photograph a few to share the idea, but I couldn't choose a favorite! They are all charming.

This next one always inspires a smile.
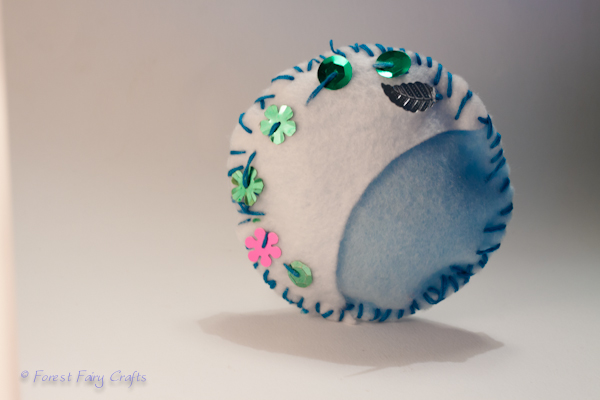
And simplicity is amazing, too. I like how this student used a whipstich around the moon and a running stitch to finish the pillow. I wouldn't have taught it that way, but it works. And the one simple line of sequins is beautiful.
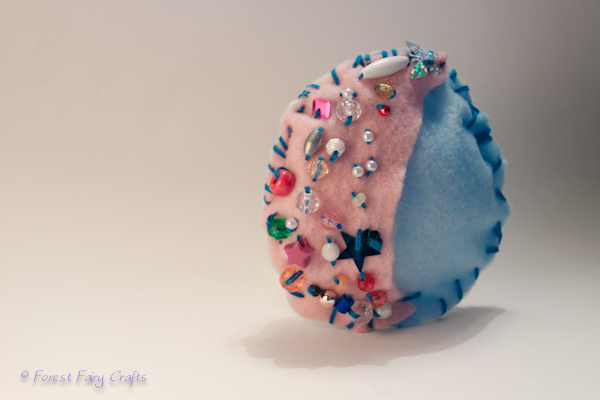
I love when sequins break out of the felt 'boundary'. This little leaf sequin seems to be floating down to land in just that spot. Very sweet. And these tight tiny whipstitches are so careful!
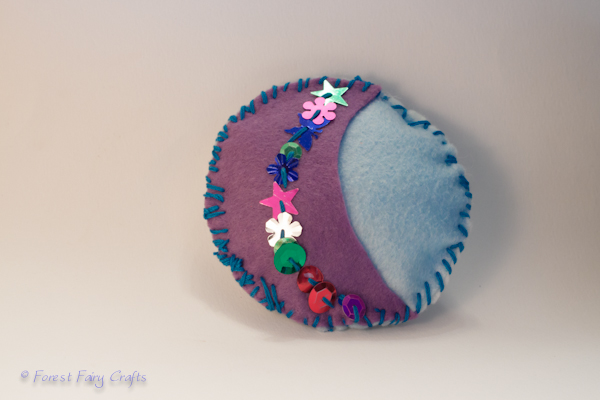
Another simple line of sequins frames the moon. I can see where the crafter started to get tired and stitches got farther apart. Sewing is hard work!
Here the sequins found many lines. This crafter was careful with colors as well. I notice patterns again, flower, moon, flower, moon. What dedication.
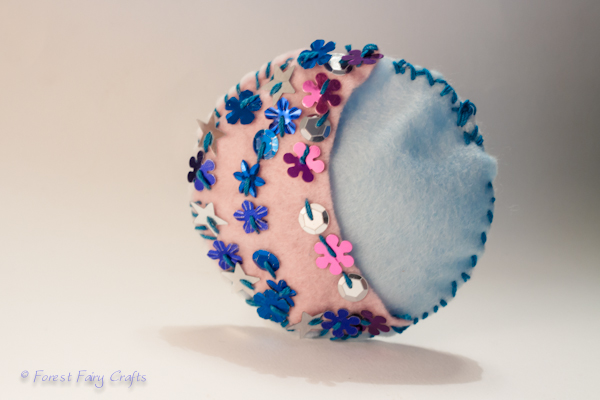
Another line of overlapping sequins. Again, those tiny little whipstitches amaze me.
We teach a K/1 class and our first graders stay in the afternoon. We have a much easier time sewing with the smaller group. These children are 6-7 years old. They had experience sewing with us last year so they know the basics of controlling the needles and adding decorations. This year will be fun for crafting!
Asia and I are working on directions for these Moon Pockets that will be available soon. If you would like hints about sewing with children, visit our Tips and Tricks. For now, I hope these inspire you like they inspired me! Best wishes!
Watercolor Lanterns
As seasons change, these beautiful lanterns celebrate those darker evenings.

To make these lovely lanterns, watercolor a long piece of paper.
When it's dry, draw a line on the back about 1/2 inch from a wide edge. Fold in half to your drawn line. Fold in half again so you have four sections. Fold up along the bottom edge to make a base.

Cut along your fold lines on the bottom edge. Draw or trace shapes on each panel. Cut out those shapes to make holes.

On the back, glue tissue paper over the holes to make pretty glowing windows.
Fold the lantern again with the bottom edges overlapping to form the base. Glue along the 1/2 extra paper from that first line you drew in the beginning. Tuck that into the lantern to glue the four sides together. Let your lantern dry.
We use battery operated candles inside our lanterns. Fire can be dangerous.
These lanterns are a beautiful reminder of light. We hope you enjoy the crafting.
Many thanks to my co-teacher, Marin, for this gorgeous craft :)
Handprint Gardens
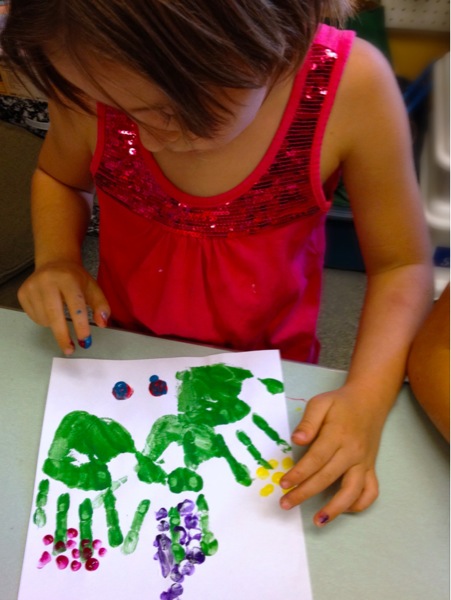
Children loved creating these gardens. A few steps steps led to wild, wonderful gardens. We are using them for Grandparents Day cards, but they would be lovely any time of year. In fact, for winter, we might make trees with fingerprint snow and bright birds. One idea leads to another :)
Step one: make handprints with green tempera paint (or acrylic, if you a brave). We made three prints of the same hand because I was working with an entire class and they needed a clean hand to turn on the faucet. At home, you could print both hands. Let the handprints dry.
Aside: I later realized we should use a color for the background- perhaps and layer of green over blue for ground and sky. Since we printed onto white paper, I used beeswax crayons to lightly shade ground and sky. The first graders painted their petals, bugs, and clouds before I shaded- both ways worked. A few children shaded their own. I had to watch that the colors wouldn't get too thick and cover their handprints. Next time, I will have them shade grass and sky first.
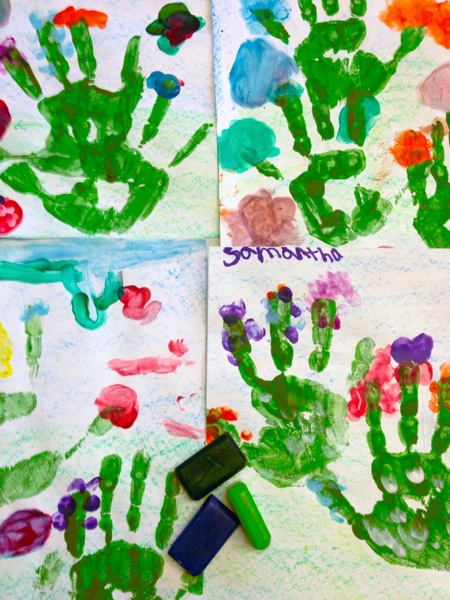
Step two: Add petals, leaves, and clouds. Use fingers! They loved dreaming up ways to create butterflies and different flowers like lupins. we did not use water to switch colors. Instead, we wiped our fingers clean with a paper towel. This kept the paint from getting drippy. I did supervise so they didn't start smearing too many colors together, or covering up their handprints with heavy petals. Let your colors dry.
Step three: Use markers to add embellishments. Add butterfly details, ladybug legs, and spiders.
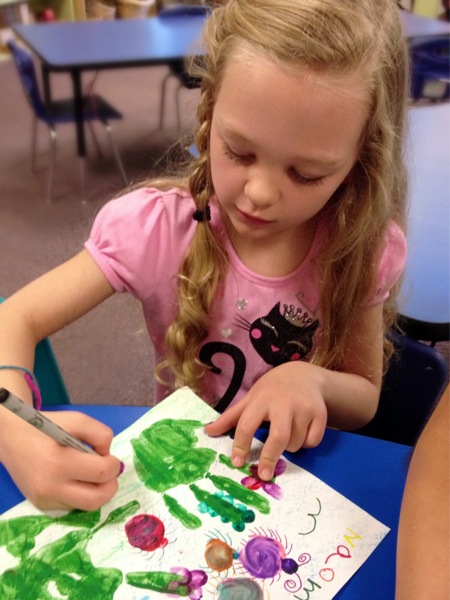
I told them that they could only color small areas- a few wanted to cover the paper with marker. I also told them to stop when the details started to overwhelm the painting. An art of childhood creativity is learning when to say Done. For personal projects that reflect their inner vision, I let them go until they say done. But every once in awhile, I say done.
A lovely moment within their gardens were the stories they shared while they drew. In my home, I would scribe their stories to go along with the illustrations. Spiderwebs and ladybug tea parties and rainbow butterflies. Beautiful!
We are gluing the gardens on colored paper-mats and writing I love you on the other side. Another adorable addition that everyone appreciates is a few open-ended prompts, like I love when my grandparents _______ and I hope they take me to the __________ and My grandparents are good at ________.
My favorite art catches personality and the moment. My favorite art is shared with proud smiles. These gardens grow wild and wonderful.
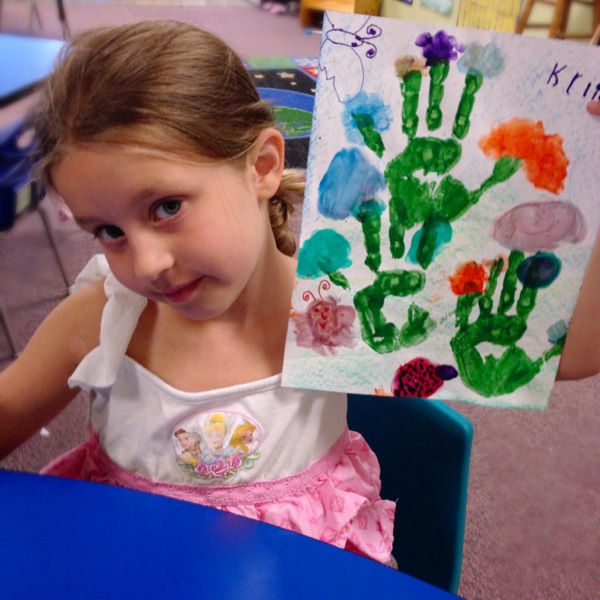
I hope you have fun painting them!
Sensory Discovery: Numbers

We love creative learning. Today, our numbers in math were 0, 6, 9, and 8. These numbers all begin with a curving line.
We connect art and writing often in the classroom. Curving lines, straight lines. And we love multi-sensory learning.
So I found dishes with a small lip around the edge, then filled them with a layer of birdseed. Before the birdseed, we drew the numbers big, using our entire bodies. We stretched up to the ceiling, then swept our arms all the way to the ground. Depending on the number, we reached up or around to make huge numbers in the air.
We also drew the numbers with a finger on our palms. The goal is to engage our muscles, fire-up our senses so that the numbers change from abstract concepts to concrete understanding. Sometimes we sit with a partner so we can use our finger to trace the letter on a friend's back (maybe we will do this tomorrow).
Their favorite part of the day was birdseed writing. We traced the numbers into the birdseed plates. They formed the circles over and over just to feel the seeds with their fingers.

And when I handed out the written practice, they happily wrote the numbers without questions or concerns. Only excitement. "Look at my numbers! And can I do the birdseed during Creative Choice? Please?"
Yes. Keep playing and learning!
PS: This activity is also fun with sand, salt, or anything with grains. They love small pebbles, too. Lots of ways to engage the body and inspire the brain :). Enjoy!
Wish Upon a Watercolor Star


The school year begins with hopes and dreams. I love to make dreams come true. So we create beautiful crafts to catch our dreams. Focus on them. Believe in them.
These watercolor stars were a three day project with our twenty kindergarten and first grade students. On day one, we painted stars. Day two, we strung beads. Day three, we wrote wishes. Along the way, we discussed ideas. What do we want? Play, discovery, friends. What fun, imagining our wonderful year!
Of course, you can wish anytime, for any reason. A wishing star would be a lovely party favor, or a baby mobile, or a rainy afternoon craft. Endless possibilities...
How do we make them?
- Cut a star with medium or heavyweight paper. We used watercolor paper. You can draw your own, or have your child draw a star, or use a free printable like this one on Spoonful.
- Children paint the star on both sides. We used watercolor paints, giving children yellow, red, and orange colors. You could use any paints you like, or markers, or colored pencils. Decorate your star.
- Thread a tapestry needle to a long piece of crochet thread. A tapestry needle has a blunt tip. It. Is perfect for children who say, "But I don't know how to sew!" Tie a bead to the ends of the thread so the other beads won't fall off.
- Have fun beading! Add beads and sequins to make a rainbow hanger for your star.
- Punch a hole into the star. Thread the needle through, tie off, and snip.
- Children write their name on one side, and their wish on the other side of the star. Hang your star in a special place. Enjoy your dream shining over you!
I encourage children to dream for emotions more than things. They may want money for our school (they know times are difficult) or toys or more books. I ask, "Why? How would you feel?" We want the emotion, not the stuff. Because maybe we can find fun and adventures another way.
At the same time, I change my ideas to catch a moment. I have a star-wish that my daughter made when she was three. Her wish?
I want to wish for a pony
That captured her. At three. Her sweetness. And that is my dream. To create projects with children that celebrate childhood. My dreams are coming true :) Enjoy!
Hearts for Sweet Beginnings

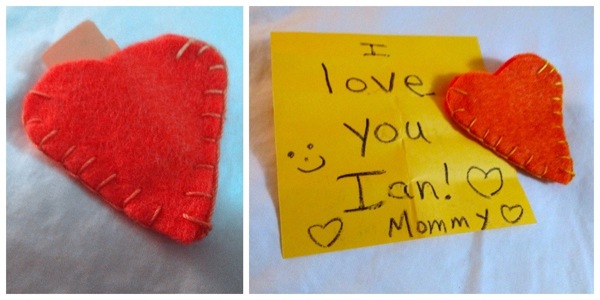
A rainbow of hearts to start the school year. The hearts were pleasantly quick and fun to sew. I used multicolor rainbow crochet thread so the colors wove through the hearts one after another.
My boy adores orange, so I made him one in his favorite color. He had his first day of transitional kindergarten today. So I tucked a little note inside the heart and placed it in his lunchbox. I couldn't be with him because I taught my own class of students. But I felt closer to him, knowing that he had a little craft to discover in his lunchbox.
For my students, I am creating a story. Our class mascot is a small dragon. I imagine that our dragon doesn't collect gold and jewels like most dragons. No, our dragon, Sparky, collects the most valuable treasures of all. Sparky collects the treasures that cannot be bought with all of the gold in the world. Sparky collects love. And kindness. And joy. And friendship. He saves these emotions in magical glass pebbles that protect the feelings inside.
We also call these pebbles Dragon-Tears, but I don't think that will make sense within the happy story. The pebbles are not Dragon-Tears, they are dragon treasures. The pebbles fit inside the little hearts perfectly. Each student can hold one through the day. For now, we plan to keep them in a basket and put the students' names inside on a watercolored slip of paper. I am sure that students will get attached to their heart and memorize whether they have red, orange, green, blue, or purple.
Perhaps Sparky knows that our students can trusted to care for Love and Friendship and Peace. And by caring for these hearts, the emotions will be nurtured in our class community as well.
A sweet way to bring those gifts into our school year. I am excited to share them with my students. Begin well, travel in joy, learn along the way. Sounds lovely. Rainbow heart lovely.
Sending inspiration your way. I wish you many precious treasures today. :)